Generating API Keys
Before you can make API calls, you'll need an API key. This guide walks you through creating your first key and managing your keys securely.
Prerequisites: Purchase Credits First
API access is available to users who have made at least one credit purchase. This security measure helps us:
- Prevent abuse and spam
- Ensure quality service for legitimate users
- Protect our infrastructure from malicious actors
If you haven't purchased credits yet, the Generate New API Key button will be disabled. Head to Buy Credits to get started.
Once you've made any credit purchase (PAYG or subscription), you can generate unlimited API keys.
Accessing the Developer Section
- Log into your Valid Email Checker account
- Click Developer in the sidebar
- You'll see the Developer API page
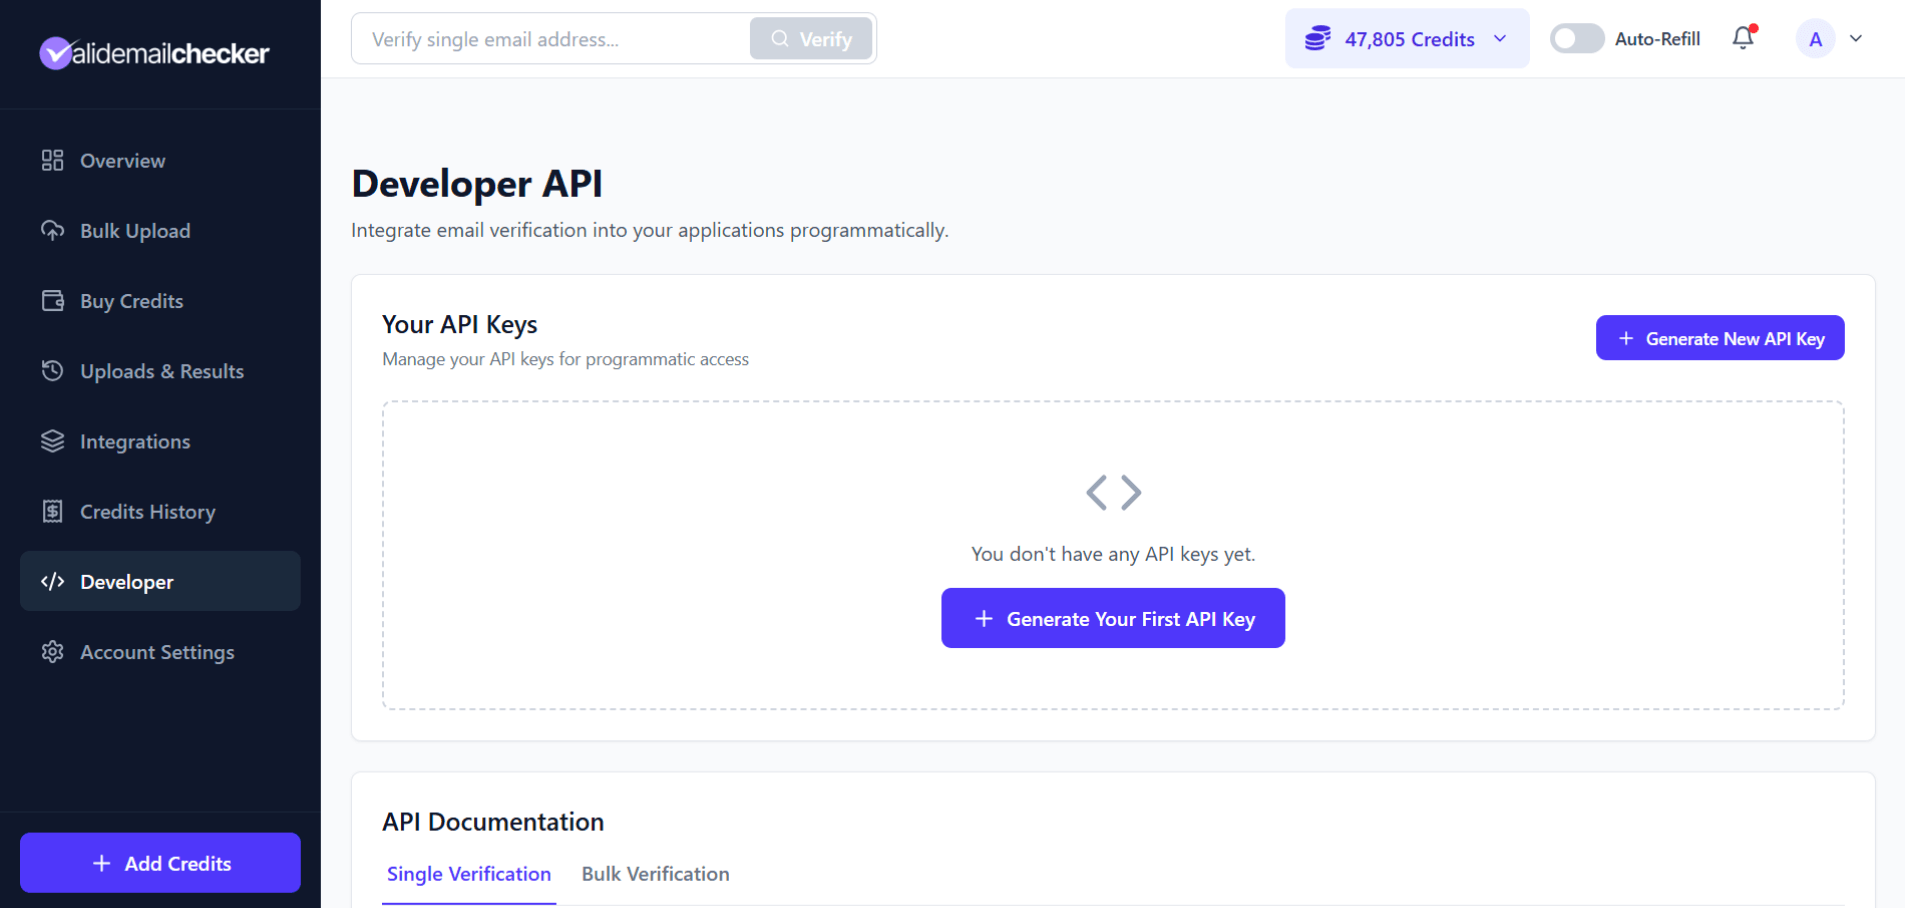
Generating Your First API Key
Here's how to create an API key:
Step 1: Click Generate
Click + Generate New API Key (or Generate Your First API Key if this is your first).
Step 2: Verify Your Email
For security, we need to confirm you own this account. A verification modal appears:
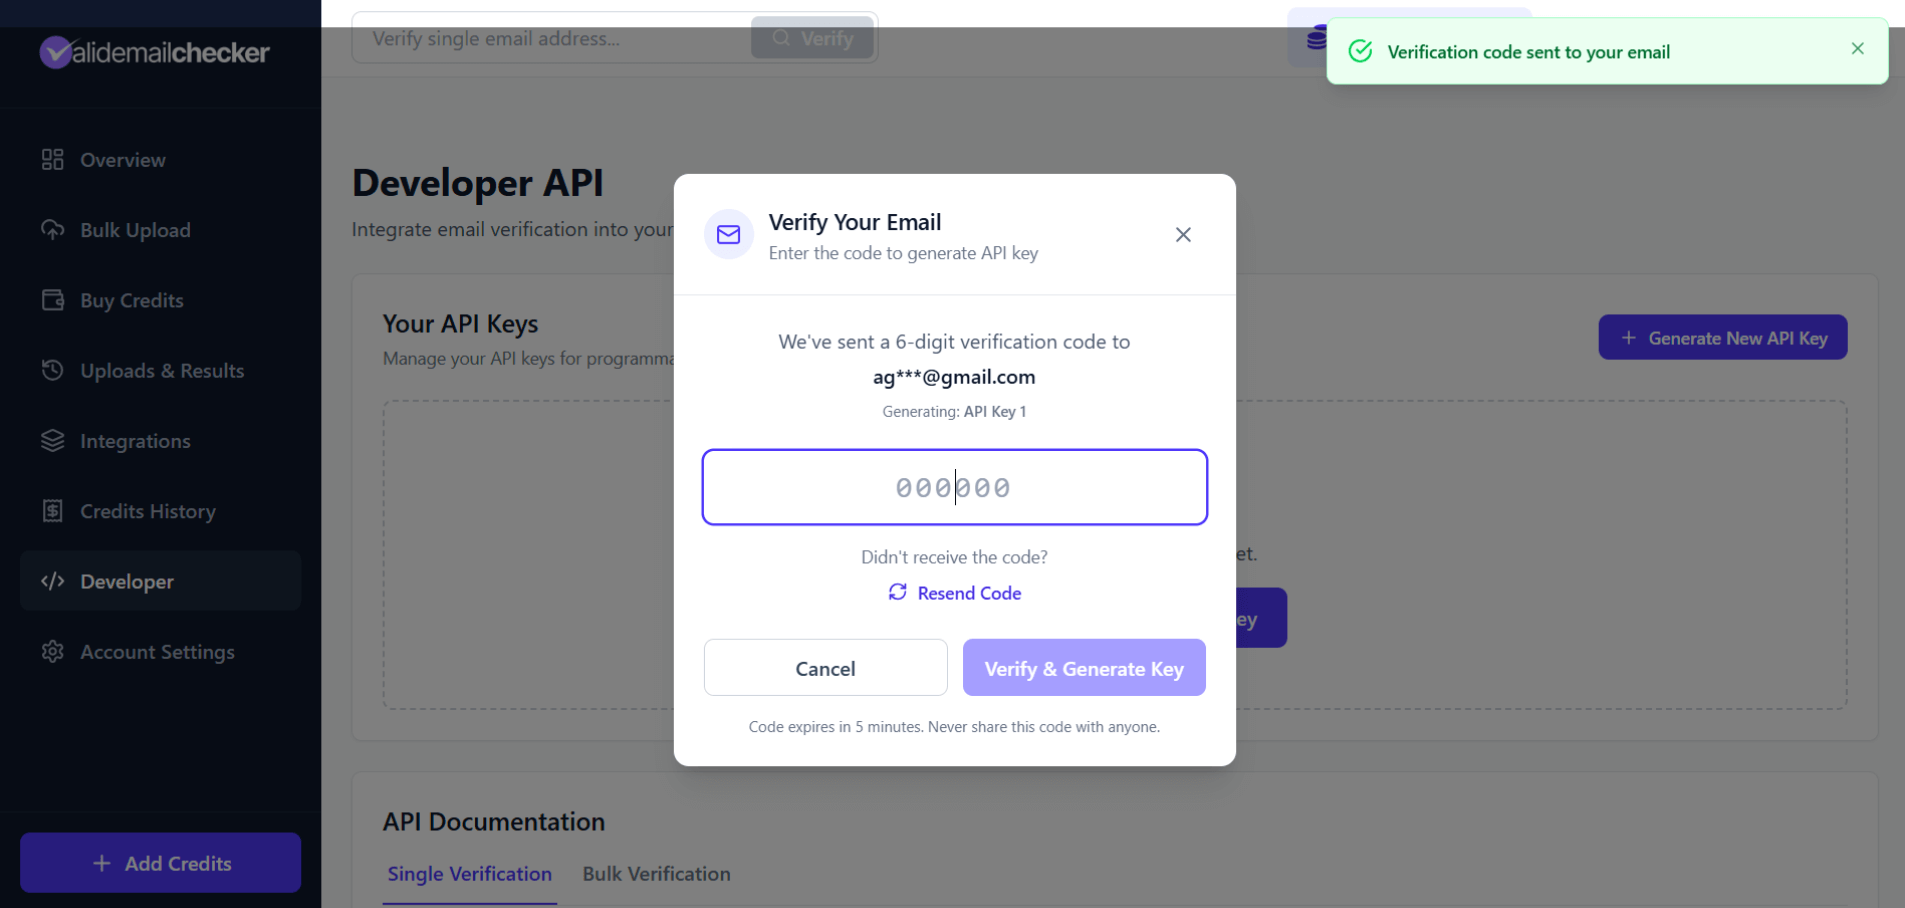
We'll send a 6-digit verification code to your registered email address.
The code expires in 5 minutes. Never share this code with anyone!
Step 3: Enter the Code
- Check your email for the verification code
- Enter the 6-digit code in the modal
- Click Verify & Generate Key
Didn't receive the code? Check your spam folder, or click Resend Code to get a new one.
Step 4: Copy Your API Key
🎉 Success! Your new API key is generated and displayed.
Important: This is the only time you'll see the full API key. Copy it immediately and store it securely.
Copy your API key now and store it safely. For security reasons, we only show the full key once. After you leave this page, you'll only see a masked version.
Understanding Your API Keys Table
Once you have keys, you'll see them listed in a table:
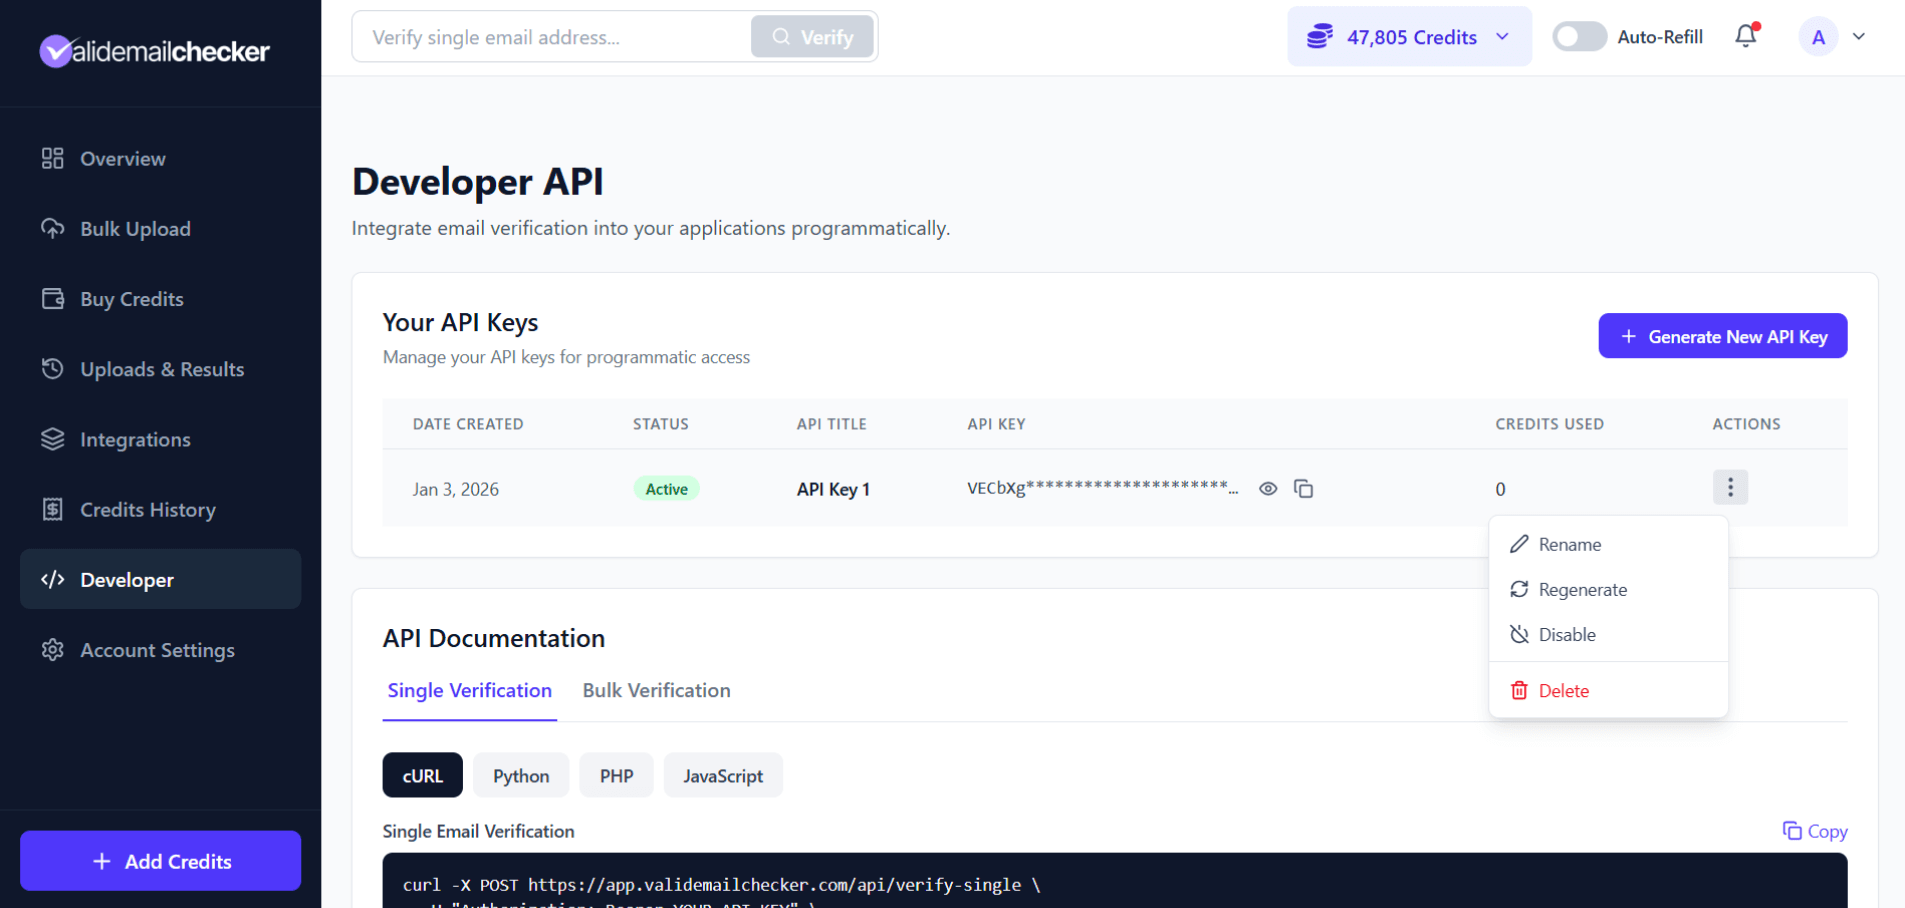
| Column | Description |
|---|---|
| Date Created | When the key was generated |
| Status | Active or Disabled |
| API Title | A friendly name for the key |
| API Key | The masked key (click 👁 to reveal, 📋 to copy) |
| Credits Used | Total credits consumed by this key |
| Actions | Management options menu |
Managing Your API Keys
Click the three-dot menu (⋮) on any key to access management options:
Rename
Give your key a descriptive name to identify its purpose:
- "Production Server"
- "Development Testing"
- "CRM Integration"
- "Marketing Automation"
This is especially helpful when you have multiple keys for different applications.
Regenerate
Creates a new key value while keeping the same settings. Use this if:
- You accidentally exposed your key
- You want to rotate keys for security
- A team member who had access has left
Regenerating immediately invalidates the old key. Any applications using the old key will stop working until you update them.
Disable
Temporarily deactivates the key without deleting it. The key:
- Cannot be used for API calls
- Keeps its usage history
- Can be re-enabled anytime
Great for:
- Pausing an integration
- Investigating suspicious activity
- Temporarily revoking a contractor's access
Delete
Permanently removes the key. This action:
- Cannot be undone
- Immediately invalidates the key
- Removes all usage tracking for that key
Only delete keys you're sure you no longer need.
Environment Variables Example
Here's how to properly store and use your API key:
Linux/macOS (bash)
# Add to ~/.bashrc or ~/.zshrc
export VEC_API_KEY="your_api_key_here"

# Use in your code
curl -X POST https://app.validemailchecker.com/api/verify-single \
  -H "Authorization: Bearer $VEC_API_KEY" \
  -H "Content-Type: application/json" \
  -d '{"email": "test@example.com"}'
Windows (PowerShell)
# Set environment variable
$env:VEC_API_KEY = "your_api_key_here"

# Use in your code
$headers = @{
    "Authorization" = "Bearer $env:VEC_API_KEY"
    "Content-Type" = "application/json"
}
Node.js (.env file)
# .env file (add to .gitignore!)
VEC_API_KEY=your_api_key_here
// In your code
require('dotenv').config();
const apiKey = process.env.VEC_API_KEY;
Python (.env file)
# .env file (add to .gitignore!)
VEC_API_KEY=your_api_key_here
# In your code
import os
from dotenv import load_dotenv

load_dotenv()
api_key = os.getenv('VEC_API_KEY')
How Many Keys Can I Have?
There's no hard limit on the number of API keys you can create. Feel free to generate separate keys for:
- Different applications
- Different environments (development, staging, production)
- Different team members
- Different integrations
This approach gives you granular control and makes security management easier.
Troubleshooting
"Generate API Key" button is disabled
You need to purchase credits first. Any credit purchase (PAYG or subscription) will enable API access.
Didn't receive verification code
- Check your spam/junk folder
- Wait 2-3 minutes (email delivery can be delayed)
- Click "Resend Code" to get a new one
- Make sure your email address is correct in Profile Settings
API key not working
- Verify the key is Active (not Disabled)
- Make sure you're copying the complete key
- Check you're using the correct Authorization header format
- Confirm you have credits available
Lost your API key
If you've lost or forgotten your key:
- You cannot recover the original key (we don't store it in plain text)
- Use Regenerate to create a new key value
- Update your applications with the new key
Common Questions
How is my API key stored?
We use SHA-256 hashing to securely store your API keys. We never store the plain text key - that's why we can only show it once when generated.
Can I see how many credits each key has used?
Yes! The Credits Used column shows the total credits consumed by each key. This helps you track usage across different integrations.
What happens if my key is compromised?
Immediately:
- Disable or Delete the compromised key
- Generate a new key
- Update your applications with the new key
- Review recent API activity for any suspicious usage
Can I set different rate limits per key?
Currently, all keys share the same rate limits (60 requests/minute, 10,000 requests/day). This is an account-wide limit, not per-key.
Next Steps
Got your API key ready? Let's make some calls!
-> Single Verification Endpoint - Verify one email at a time
-> Bulk Verification Endpoint - Verify lists programmatically