AWeber Integration
Connect your AWeber account to Valid Email Checker and verify your subscriber lists without exporting a single file. This integration uses secure OAuth authentication—no API keys to manage.
What You Can Do
Once connected, you can:
- Import lists directly from AWeber for verification
- See subscriber counts before importing
- Clean lists automatically by removing or unsubscribing bad emails
- Connect multiple AWeber accounts if you manage several
Before You Start
Make sure you have:
- An active AWeber account
- At least one list with subscribers
- Valid Email Checker credits for verification
Connecting AWeber
AWeber uses OAuth authentication. Instead of copying API keys, you'll log into AWeber and authorize the connection. Here's how:
Step 1: Start the Connection
- Go to Integrations in your sidebar
- Click + Connect Integration
- Find AWeber in the list and click it
You'll see the connection setup screen:
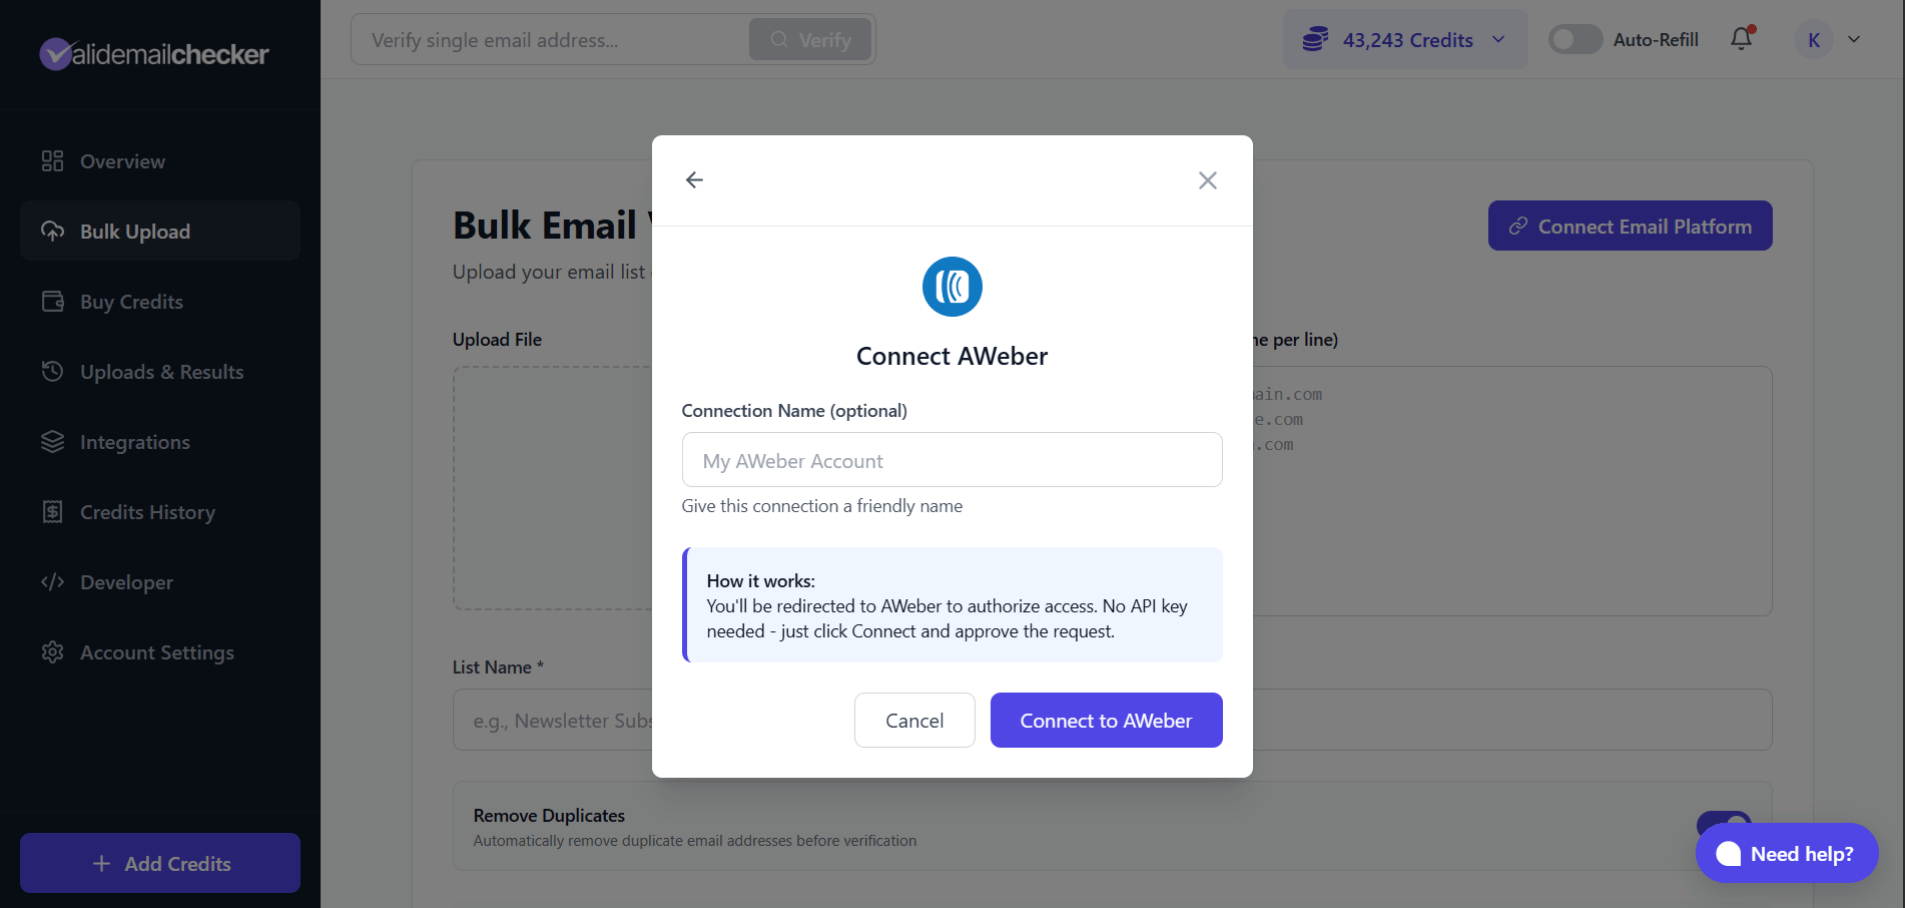
Step 2: Name Your Connection (Optional)
The Connection Name field is optional but helpful if you plan to connect multiple AWeber accounts. For example:
- "Main Newsletter Account"
- "Client - ABC Company"
- "Personal AWeber"
If you leave it blank, we'll use a default name.
Step 3: Authorize with AWeber
Click Connect to AWeber. You'll be redirected to AWeber's authorization page:
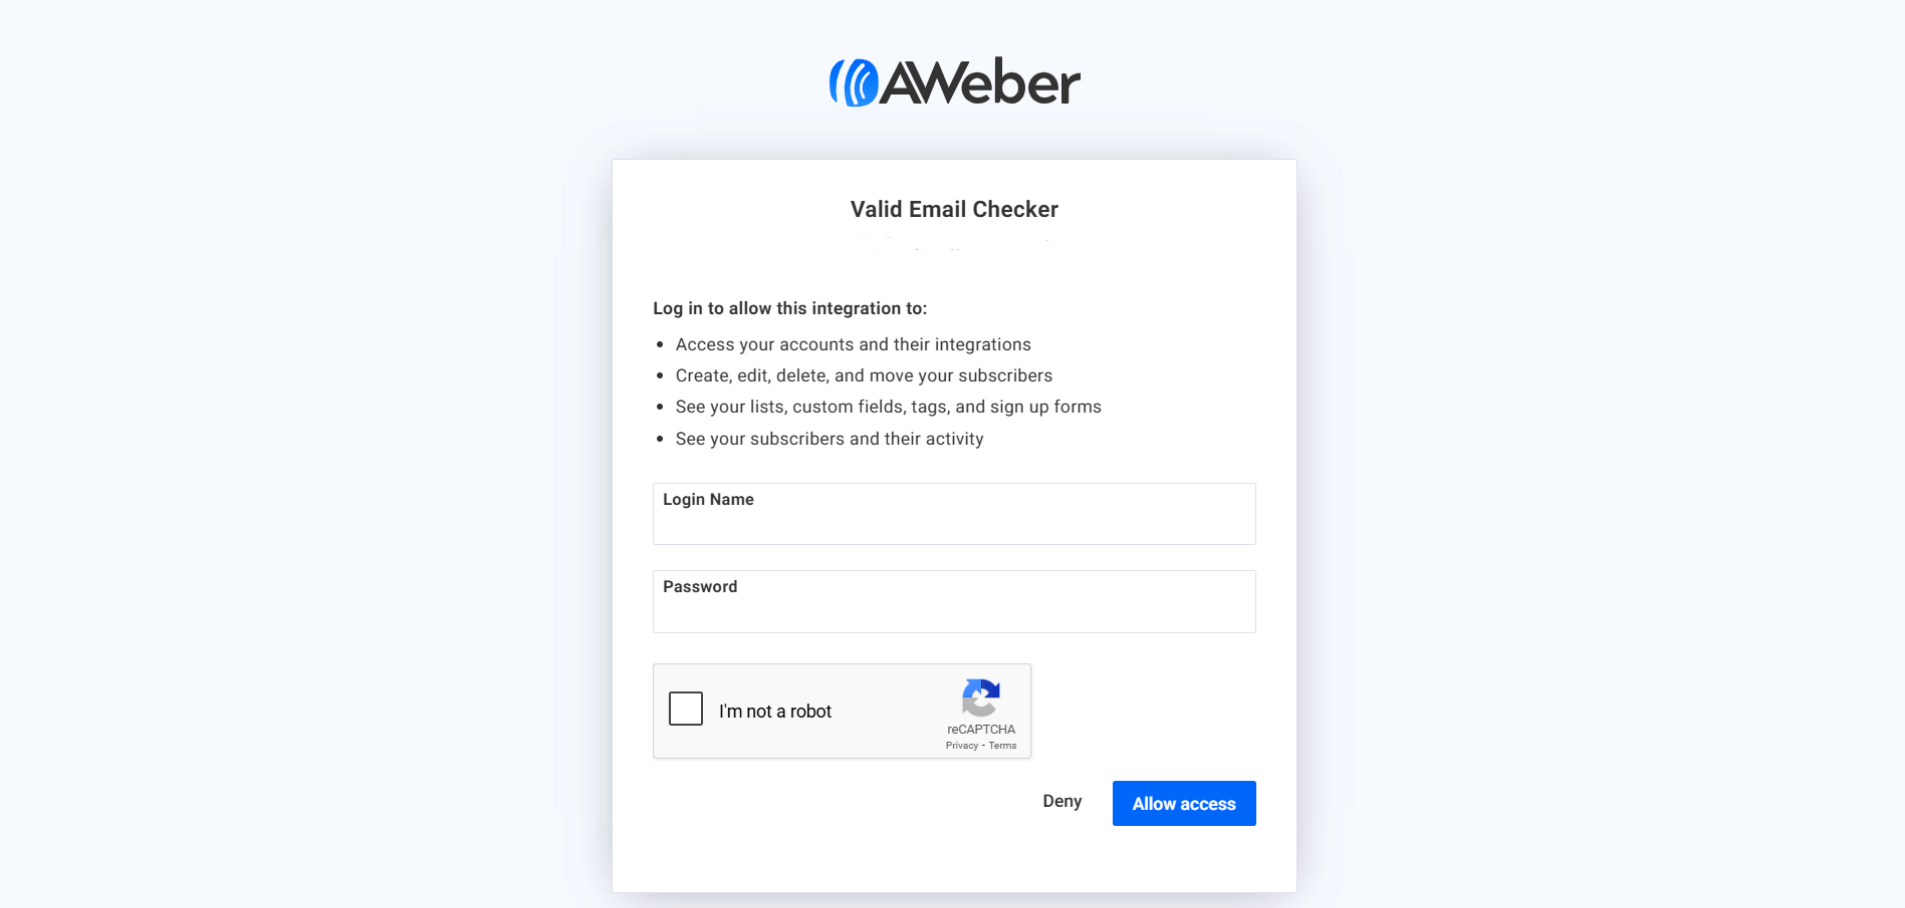
This page shows what Valid Email Checker will be able to access:
- Access your accounts and their integrations
- Create, edit, delete, and move your subscribers
- See your lists, custom fields, tags, and sign up forms
- See your subscribers and their activity
We need subscriber access to import your lists for verification. The "edit and delete" permission allows us to remove invalid emails when you choose automatic list cleaning. We never send emails to your subscribers or modify your account settings.
Enter your AWeber login credentials, complete the reCAPTCHA, and click Allow access.
Step 4: Connection Complete
After authorizing, you'll be returned to Valid Email Checker. Your AWeber account is now connected and ready to use.
Verifying an AWeber List
Now for the fun part—let's verify some emails.
Step 1: Select Your Connection
Go to Bulk Upload and click Connect Email Platform. You'll see your connected AWeber accounts:
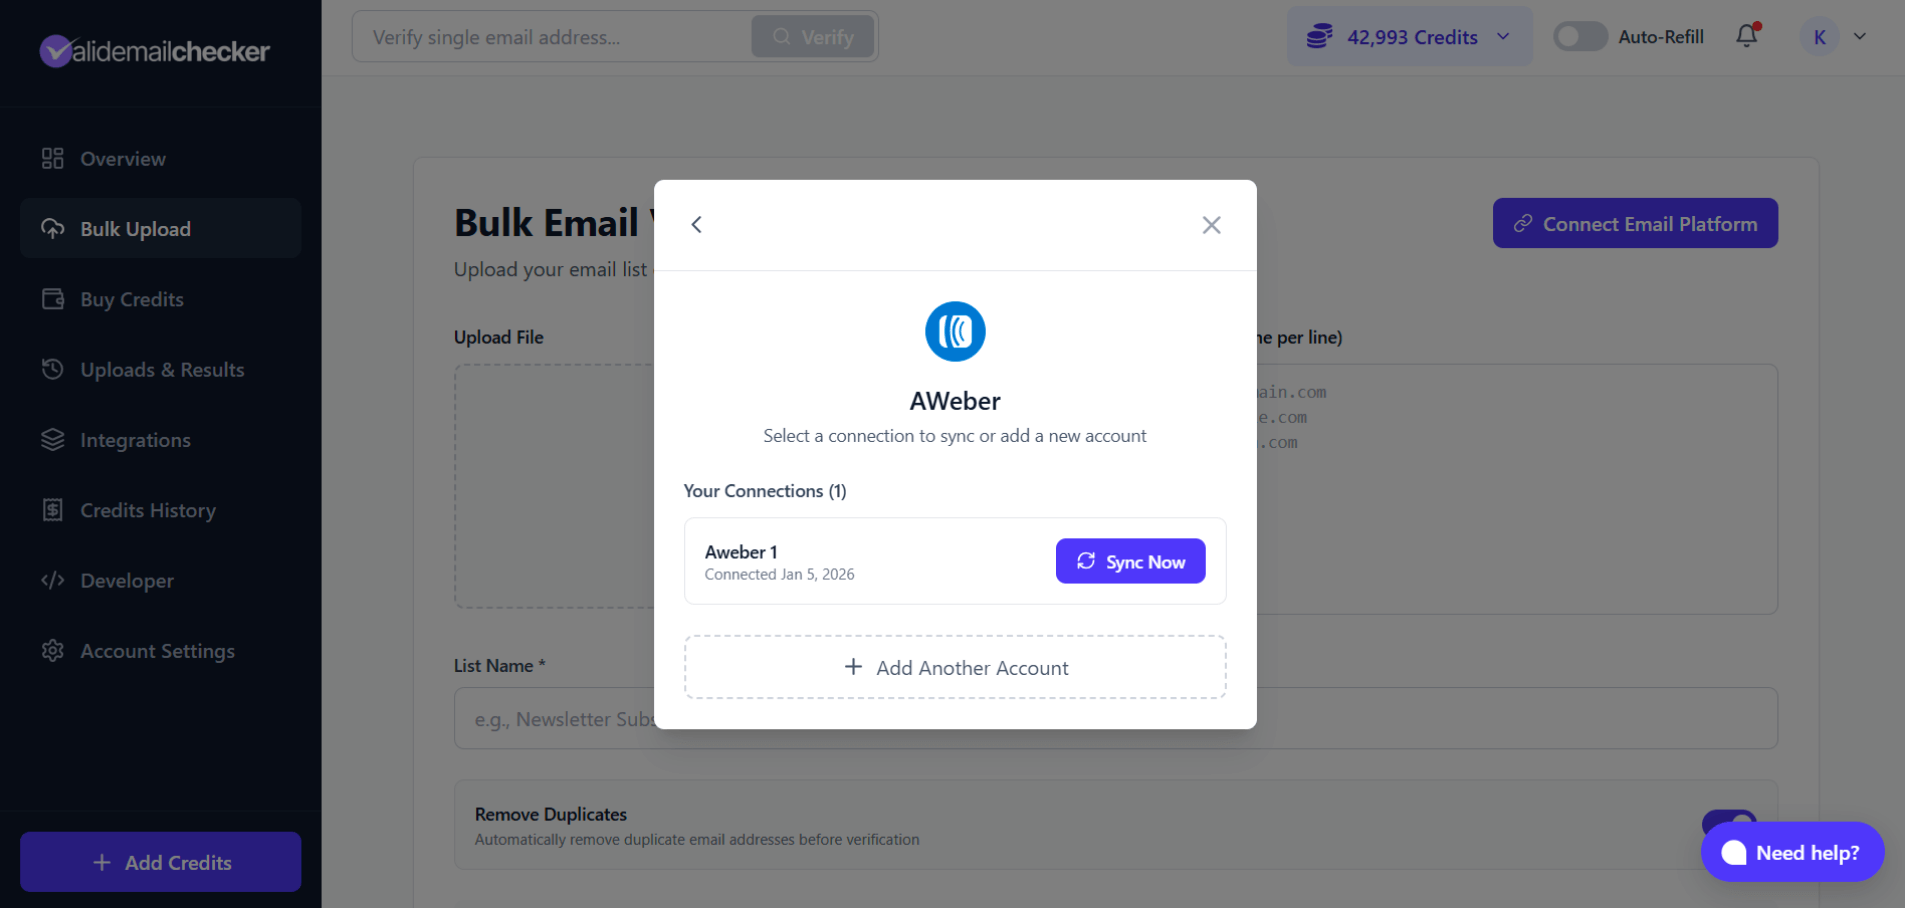
The connection picker displays all your connected AWeber accounts. Click Sync Now on the account you want to use, or click + Add Another Account to connect additional AWeber accounts.
Step 2: Choose a List
After syncing, you'll see all your AWeber lists with subscriber counts:
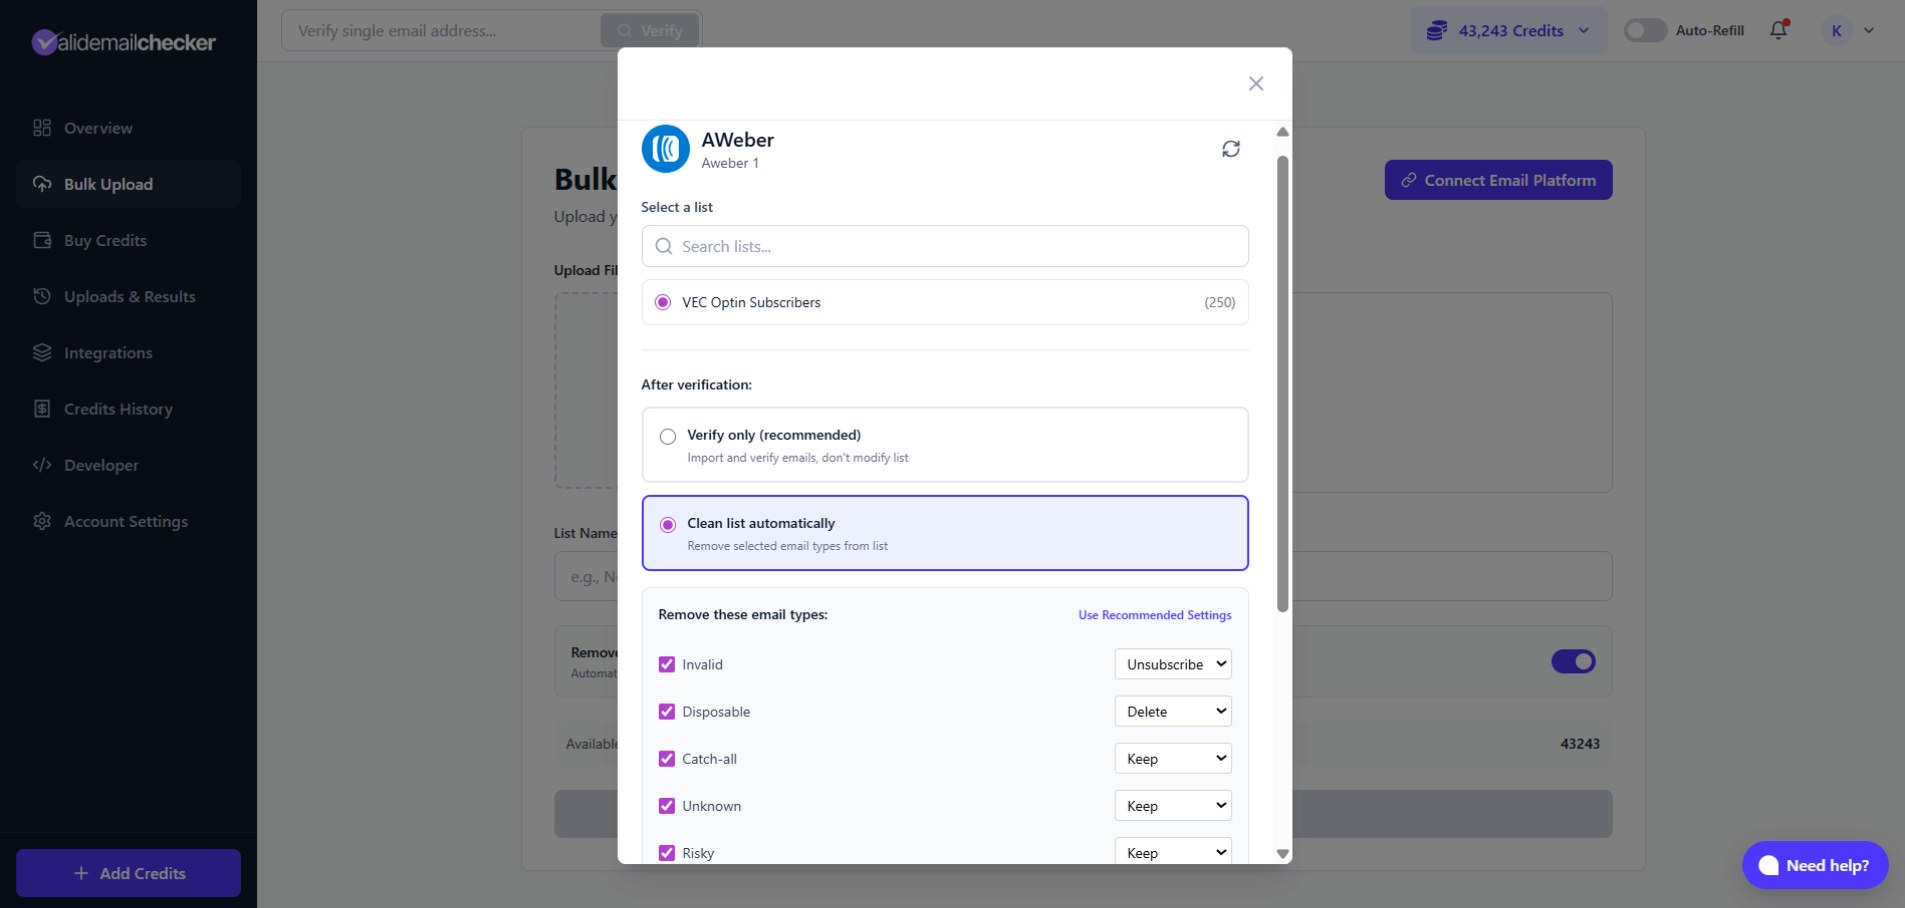
Select the list you want to verify. The number in parentheses shows how many subscribers are in that list.
Have a big list? No problem. Valid Email Checker handles lists of any size. Just make sure you have enough credits—each email costs 1 credit to verify.
Step 3: Choose What Happens After Verification
This is where you decide how hands-on you want to be. You have two options:
Option A: Verify Only
Select Verify only to import and verify emails without making any changes to your AWeber list.
- Emails are imported and verified
- Your AWeber list stays exactly as it is
- You review results and decide what to do
- Best for: First-time users, cautious cleaners, compliance requirements
Option B: Clean List Automatically
Select Clean list automatically to have bad emails removed from your AWeber list after verification.
When you choose this option, you can customize exactly what happens to each email type:
| Email Type | Available Actions | Default |
|---|---|---|
| Invalid | Unsubscribe, Delete, Keep | Unsubscribe |
| Disposable | Unsubscribe, Delete, Keep | Delete |
| Catch-all | Unsubscribe, Delete, Keep | Keep |
| Unknown | Unsubscribe, Delete, Keep | Keep |
| Risky | Unsubscribe, Delete, Keep | Keep |
Understanding the Actions:
- Unsubscribe — Marks the subscriber as unsubscribed in AWeber. They remain in your list but won't receive emails. Good for compliance and record-keeping.
- Delete — Permanently removes the subscriber from your AWeber list. They're gone completely.
- Keep — Does nothing. The subscriber stays active in your list.
Automatic cleaning can't be undone. If you're not sure, start with Verify only and clean manually after reviewing the results.
Step 4: Start Verification
Click the verify button to begin. You'll be taken to the Uploads & Results page where you can watch the progress:
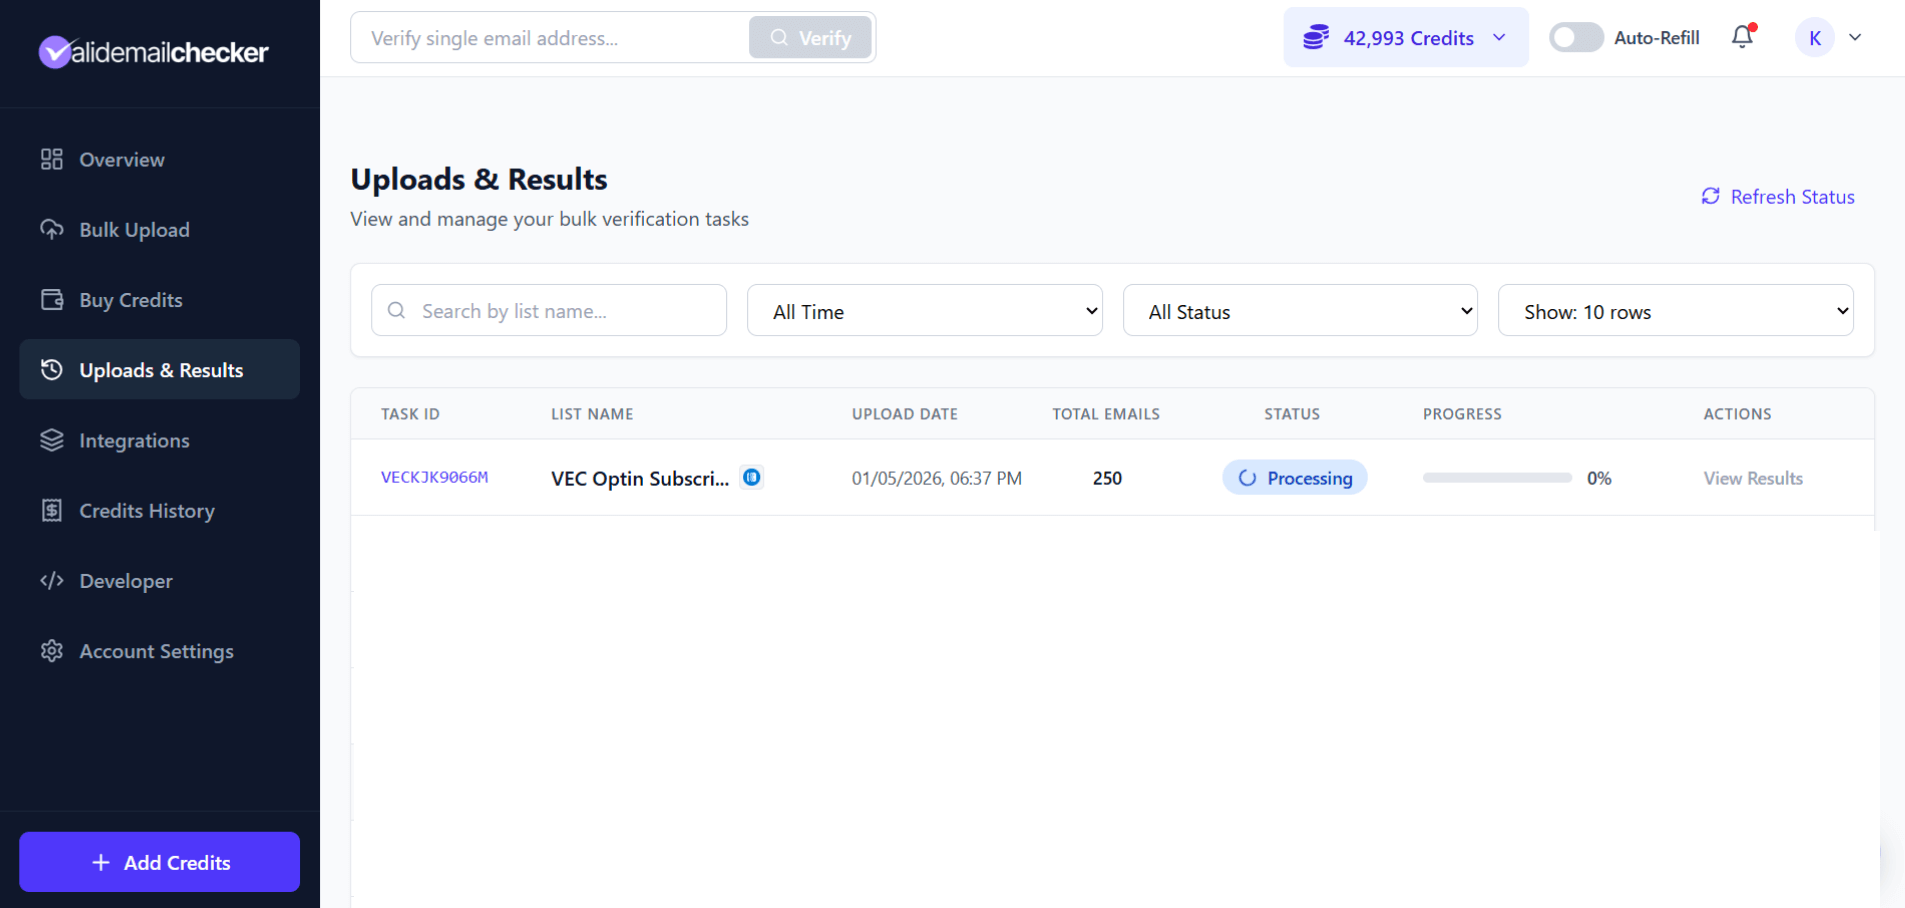
The integration icon next to your list name indicates this verification came from AWeber.
What you'll see:
| Column | Description |
|---|---|
| Task ID | Unique identifier for this verification (e.g., VECKDRPH44L) |
| List Name | The name of your ActiveCampaign list |
| Upload Date | When you started the verification |
| Total Emails | Number of contacts being verified |
| Status | Current state (Processing, Completed, etc.) |
| Progress | Percentage complete with progress bar |
| Actions | View Results, Delete |
The page updates automatically—no need to refresh. You'll also see a notification in the top right showing "Importing emails from integration..." while we pull your contacts.
Status meanings:
- 🔄 Processing — Verification in progress
- ✅ Completed — All done! Click "View Results" to see the breakdown
- ⚠️ Completed with Warning — Finished, but some emails couldn't be processed (credits refunded)
- ❌ Failed — Something went wrong (rare)
- 🗑️ Deleted — File deleted after 15 days on our server
Once verification completes, click View Results to see the breakdown.
Managing Your AWeber Connection
Viewing Connected Accounts
Go to Integrations to see all your connected AWeber accounts:
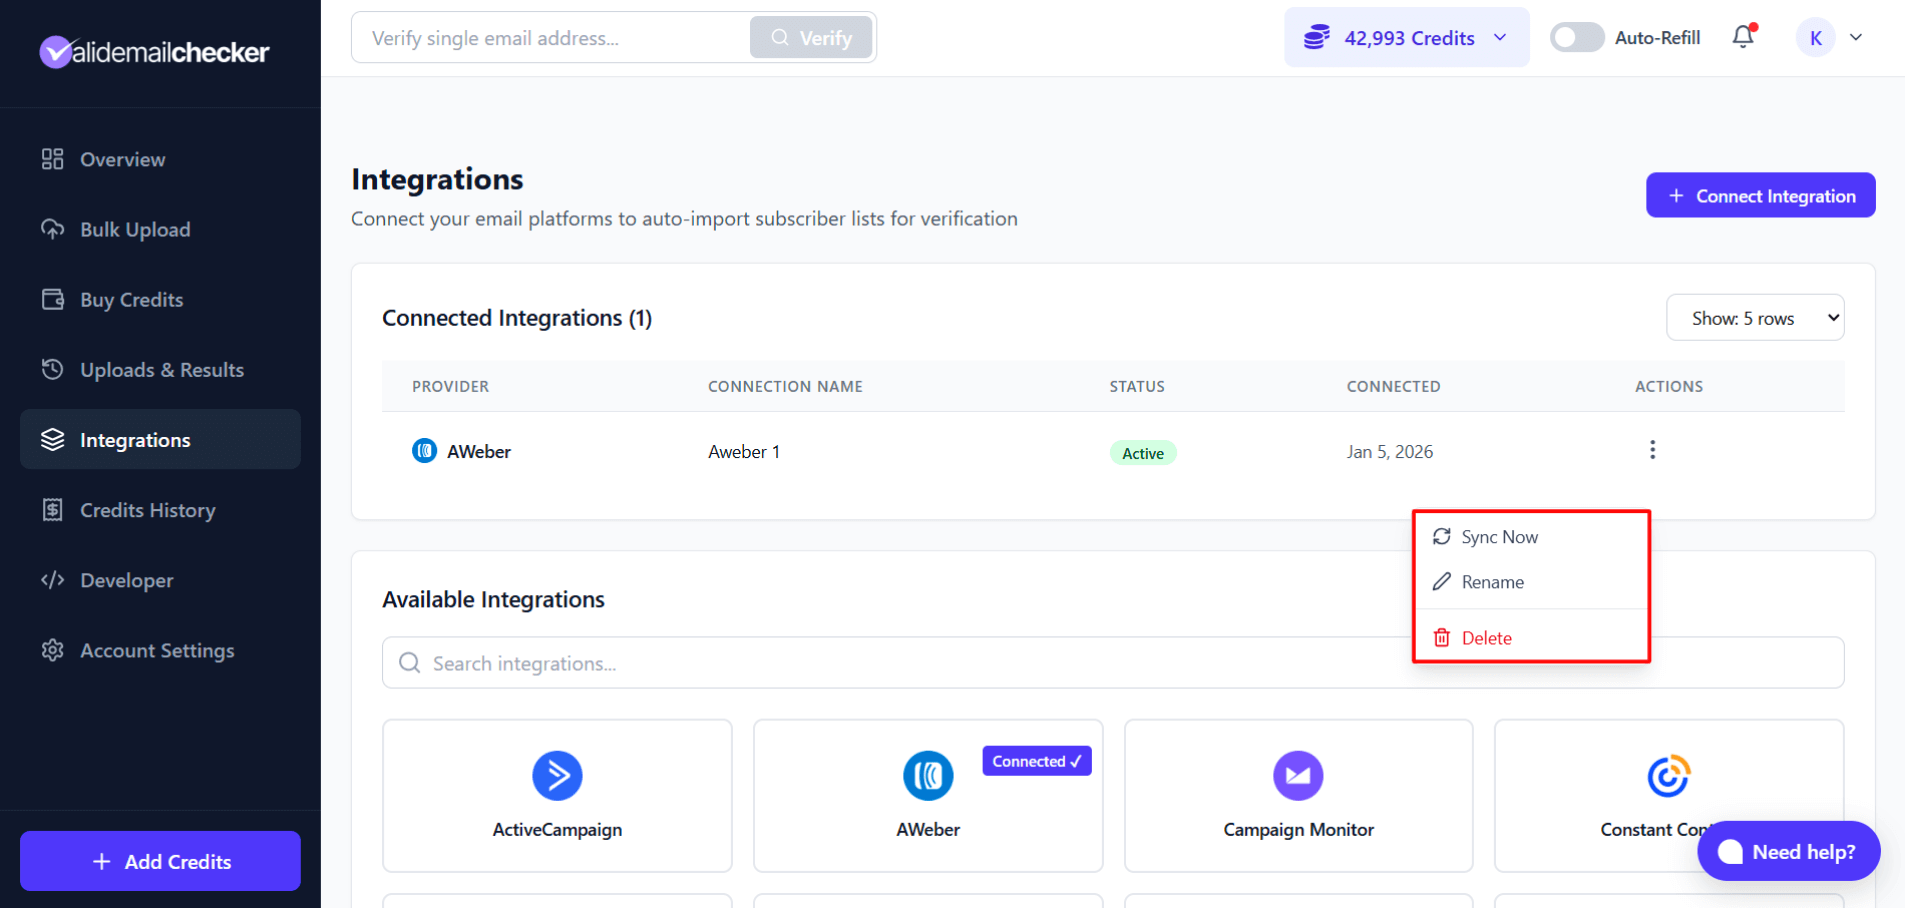
Each connection shows:
- Provider — AWeber logo and name
- Connection Name — The name you gave it (or default)
- Status — Active
- Connected — When you connected it
Available Actions
Click the three-dot menu on any connection to access:
| Action | What It Does |
|---|---|
| Sync Now | Refreshes your AWeber lists and subscriber counts |
| Rename | Changes the connection's display name |
| Delete | Removes the connection entirely |
When to Sync
Hit Sync Now when:
- You've added new lists in AWeber
- Subscriber counts seem outdated
- You've made significant changes to your lists
Syncing is fast and doesn't use any credits.
Deleting a Connection
If you no longer need an AWeber connection:
- Go to Integrations
- Find the connection you want to remove
- Click the three-dot menu
- Select Delete
- Confirm the deletion
Deleting a connection only removes it from Valid Email Checker. Your AWeber account and all your subscribers remain untouched. You can always reconnect later.
Connecting Multiple AWeber Accounts
Managing newsletters for different clients or brands? You can connect as many AWeber accounts as you need.
Adding Another Account
- Go to Bulk Upload → Connect Email Platform
- Select AWeber
- In the connection picker, click + Add Another Account
- Complete the OAuth authorization for the new account
- Give it a descriptive name to tell them apart
Each account shows separately in your connection picker, making it easy to switch between them.
Switching Between Accounts
When you have multiple accounts connected:
- Click on Aweber from the Bulk Upload page or Integrations page
- The connection picker displays all your connected accounts
- Click Sync Now on the account you want to use
- Select your list and verify as usual
AWeber-Specific Tips
Unsubscribe vs Delete
AWeber gives you both options. Here's when to use each:
Use Unsubscribe when:
- You need to maintain records for compliance
- You want to prevent the email from being re-added
- You're cleaning role-based emails you might want to review later
Use Delete when:
- The email is clearly invalid or fake
- You want a completely clean list
- You're removing disposable emails
Re-authorization
OAuth tokens can expire. If you see a connection error:
- Delete the existing AWeber connection
- Reconnect using the same process
- Re-authorize on AWeber's site
This refreshes your access token and restores the connection.
List Segments
Currently, the integration imports your main AWeber lists. If you use segments within AWeber, they'll be included in the main list import. For segment-specific verification, consider exporting that segment as a CSV and using bulk file upload instead.
Troubleshooting
"Authorization Failed"
If AWeber doesn't authorize the connection:
- Make sure you're logging into the correct AWeber account
- Check that your AWeber subscription is active
- Try clearing your browser cache and cookies
- Use an incognito/private window
Lists Not Showing
If your AWeber lists don't appear after connecting:
- Click Sync Now to refresh
- Make sure the lists have at least one subscriber
- Check that you authorized the correct AWeber account
Connection Shows "Disconnected"
This usually means the OAuth token expired. Delete the connection and reconnect to get a fresh token.
Subscribers Not Updating After Cleaning
AWeber updates can take a few moments to process. If subscribers aren't showing as unsubscribed or deleted:
- Wait 2-3 minutes
- Refresh your AWeber list
- Check the verification results for any errors
Frequently Asked Questions
Does connecting AWeber cost credits?
No. Connecting and syncing your AWeber account is free. You only use credits when you actually verify emails.
Can I connect multiple AWeber accounts?
Yes! Connect as many accounts as you need. Each gets its own connection with a separate name.
Will you send emails to my subscribers?
Never. We only read your subscriber emails for verification and optionally remove bad ones. We never send any emails to your list.
What happens to my AWeber data?
We import subscriber emails temporarily for verification. After 15 days, verification results are automatically deleted from our system. We never store your subscriber data permanently.
Can I undo automatic cleaning?
No. Once emails are unsubscribed or deleted from AWeber, the action can't be reversed through Valid Email Checker. Always start with Verify only if you're unsure.
Why do you need permission to "edit and delete" subscribers?
This permission is only used when you choose Clean list automatically. It allows us to unsubscribe or delete invalid emails from your list. If you choose Verify only, we never modify your subscribers.
Can I verify all my lists at once?
Currently, you verify one list at a time. This gives you more control over the process and lets you apply different cleaning rules to different lists.
Next Steps
- View your verification results — Learn how to analyze and export your results
- Understanding result types — What each verification status means
- Connect another platform — Add more email platforms
Need Help?
Running into issues with your AWeber integration? We're here to help:
- Live Chat — Click the chat bubble in the corner
- Email — support@validemailchecker.com
- Contact Form — validemailchecker.com/contact-us