Constant Contact Integration
Connect your Constant Contact account to Valid Email Checker and verify your subscriber lists without exporting a single file. Our direct integration lets you clean your lists right where they live.
What You'll Need
Before connecting Constant Contact to Valid Email Checker, make sure you have:
- A Valid Email Checker account with available credits
- A Constant Contact account with at least one contact list
- Your Constant Contact login credentials
Constant Contact uses OAuth authentication. You'll simply log in to your Constant Contact account to authorize the connection - no need to hunt for API keys or tokens.
Connecting Your Account
Step 1: Start the Connection
- Log in to your Valid Email Checker dashboard
- Go to Bulk Upload in your sidebar and Click Connect Email Platform, or go to Integrations in the sidebar.
- Find Constant Contact in the available integrations
- Click to start the connection process
Step 2: Name Your Connection
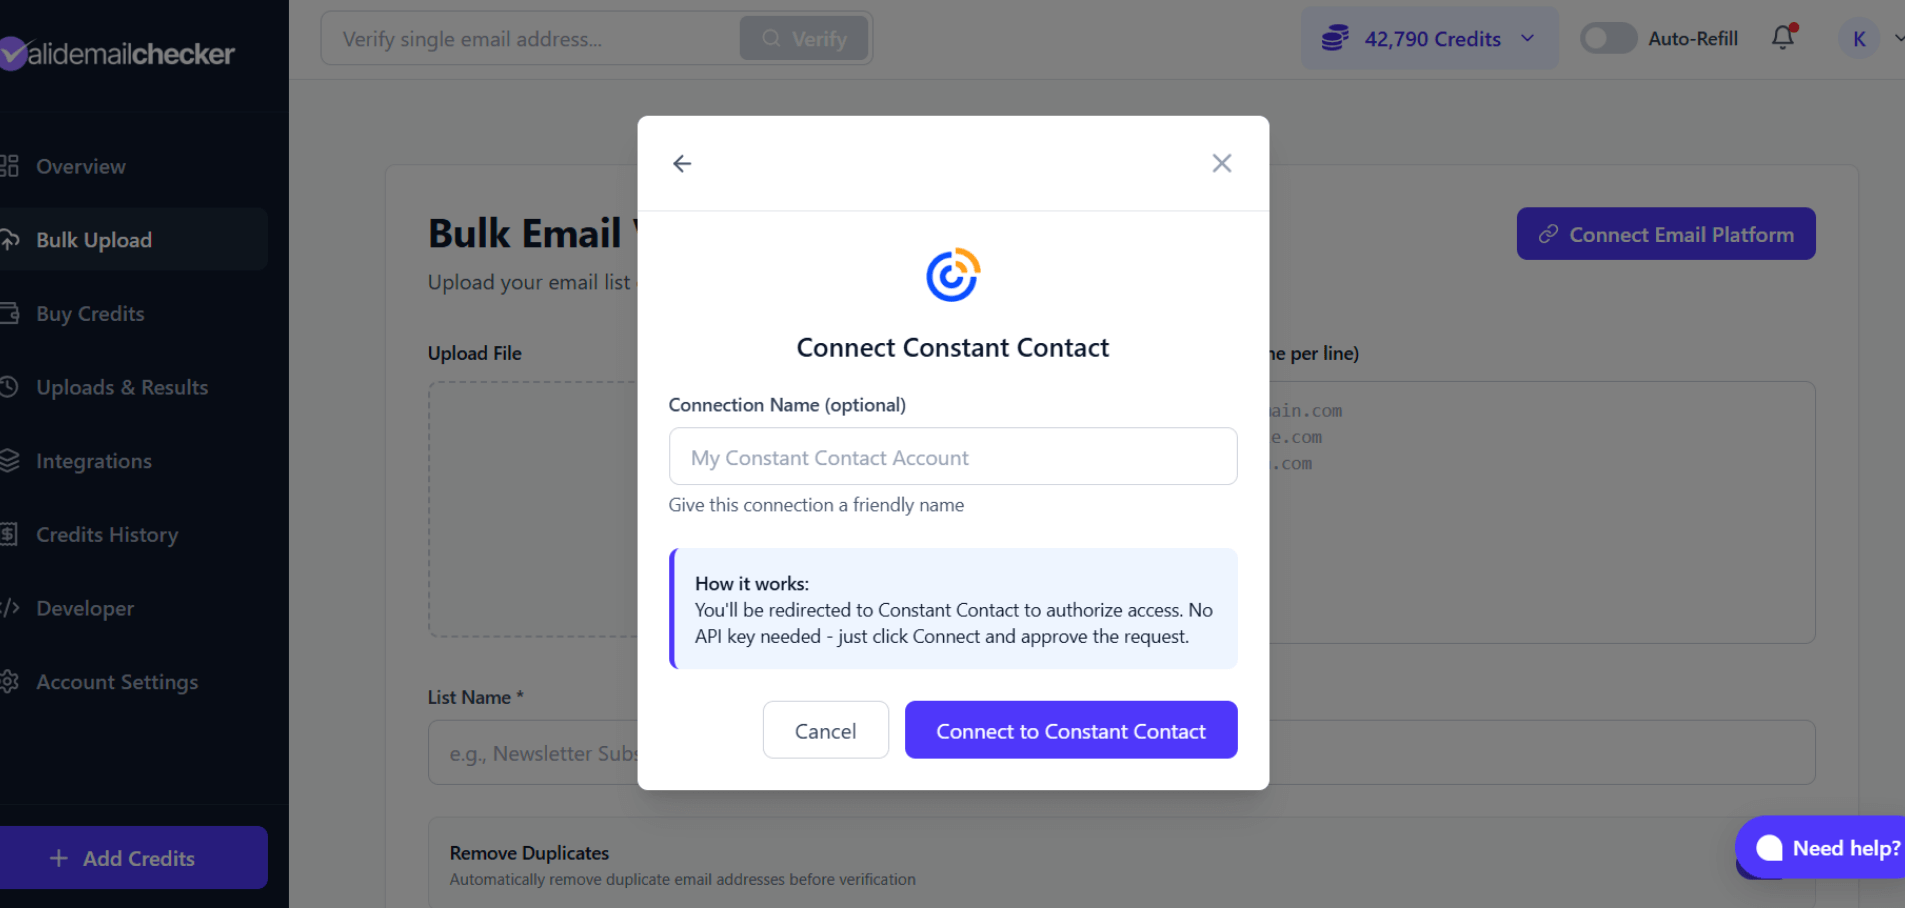
Give your connection a friendly name (optional but recommended if you manage multiple accounts). This helps you identify which Constant Contact account you're working with later.
Click Connect to Constant Contact to proceed.
Step 3: Authorize Access

You'll be redirected to Constant Contact's secure login page. Sign in using:
- Your Constant Contact username and password
- Google account (if linked)
- Facebook account (if linked)
After signing in, Constant Contact might ask you to authorize Valid Email Checker to access your contact lists. Click Allow to grant permission if asked.
Step 4: Connection Complete
Once authorized, you'll be redirected back to Valid Email Checker. Your Constant Contact account is now connected and ready to use.
Verifying Your Lists
Selecting a List to Verify
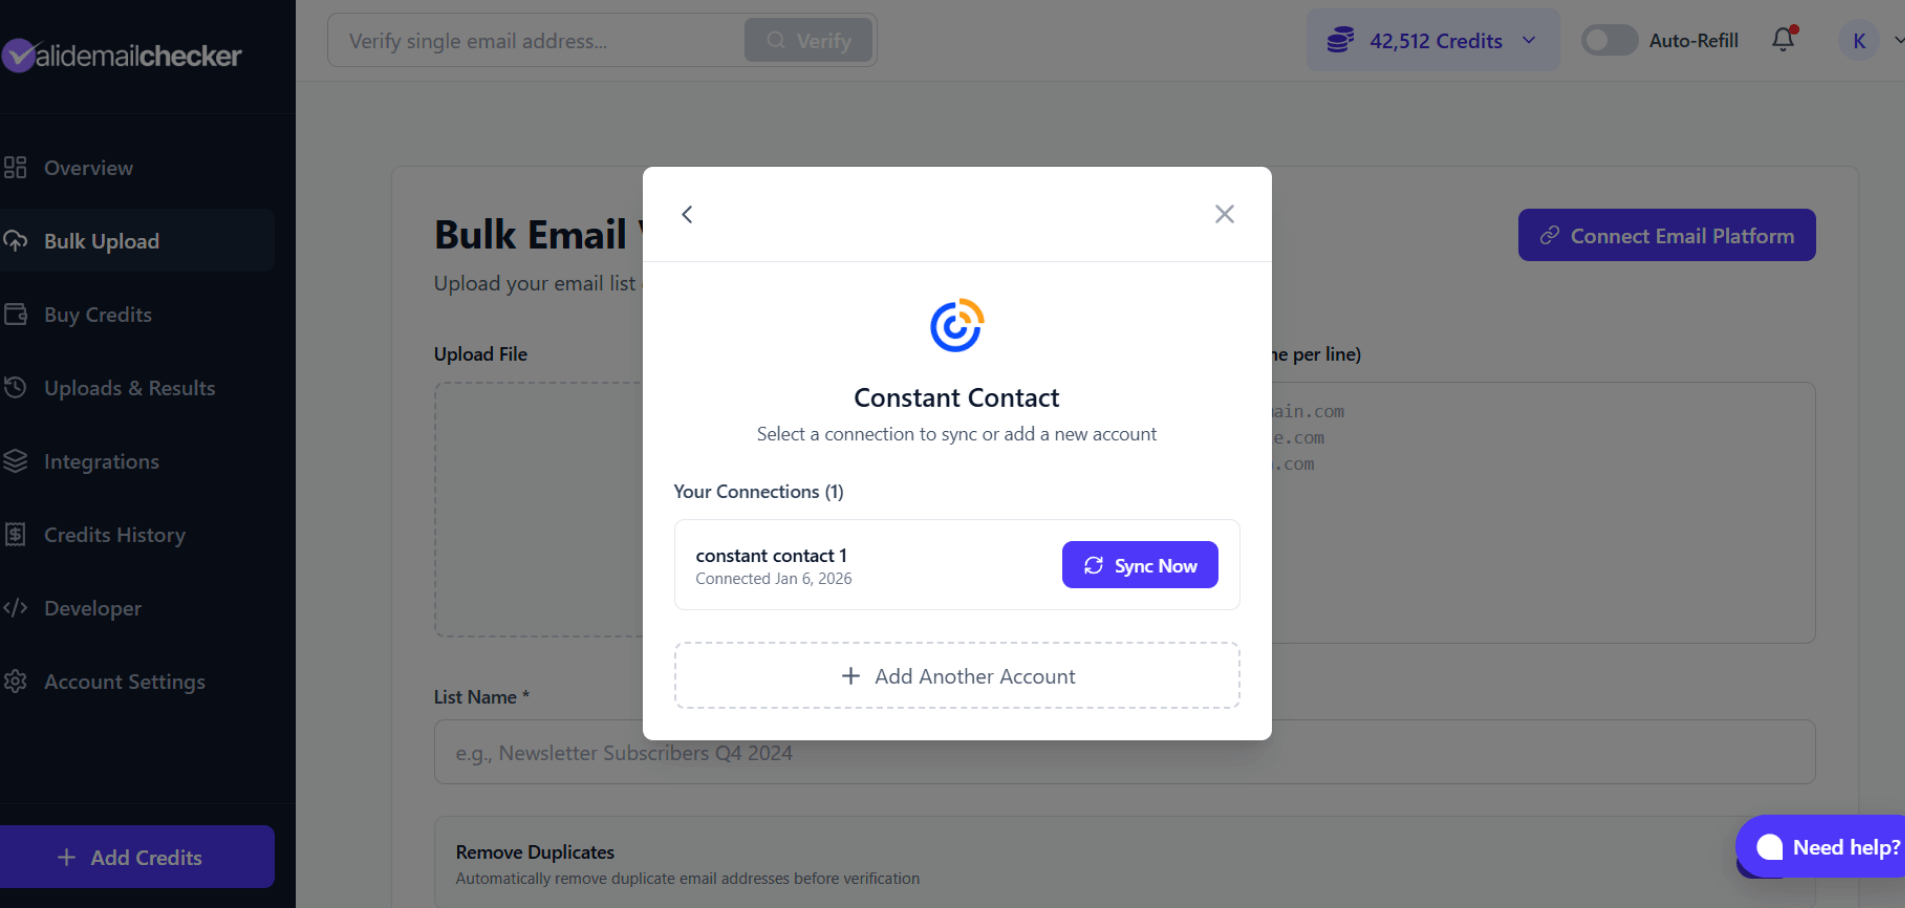
After connecting, click Sync Now to see your Constant Contact lists:
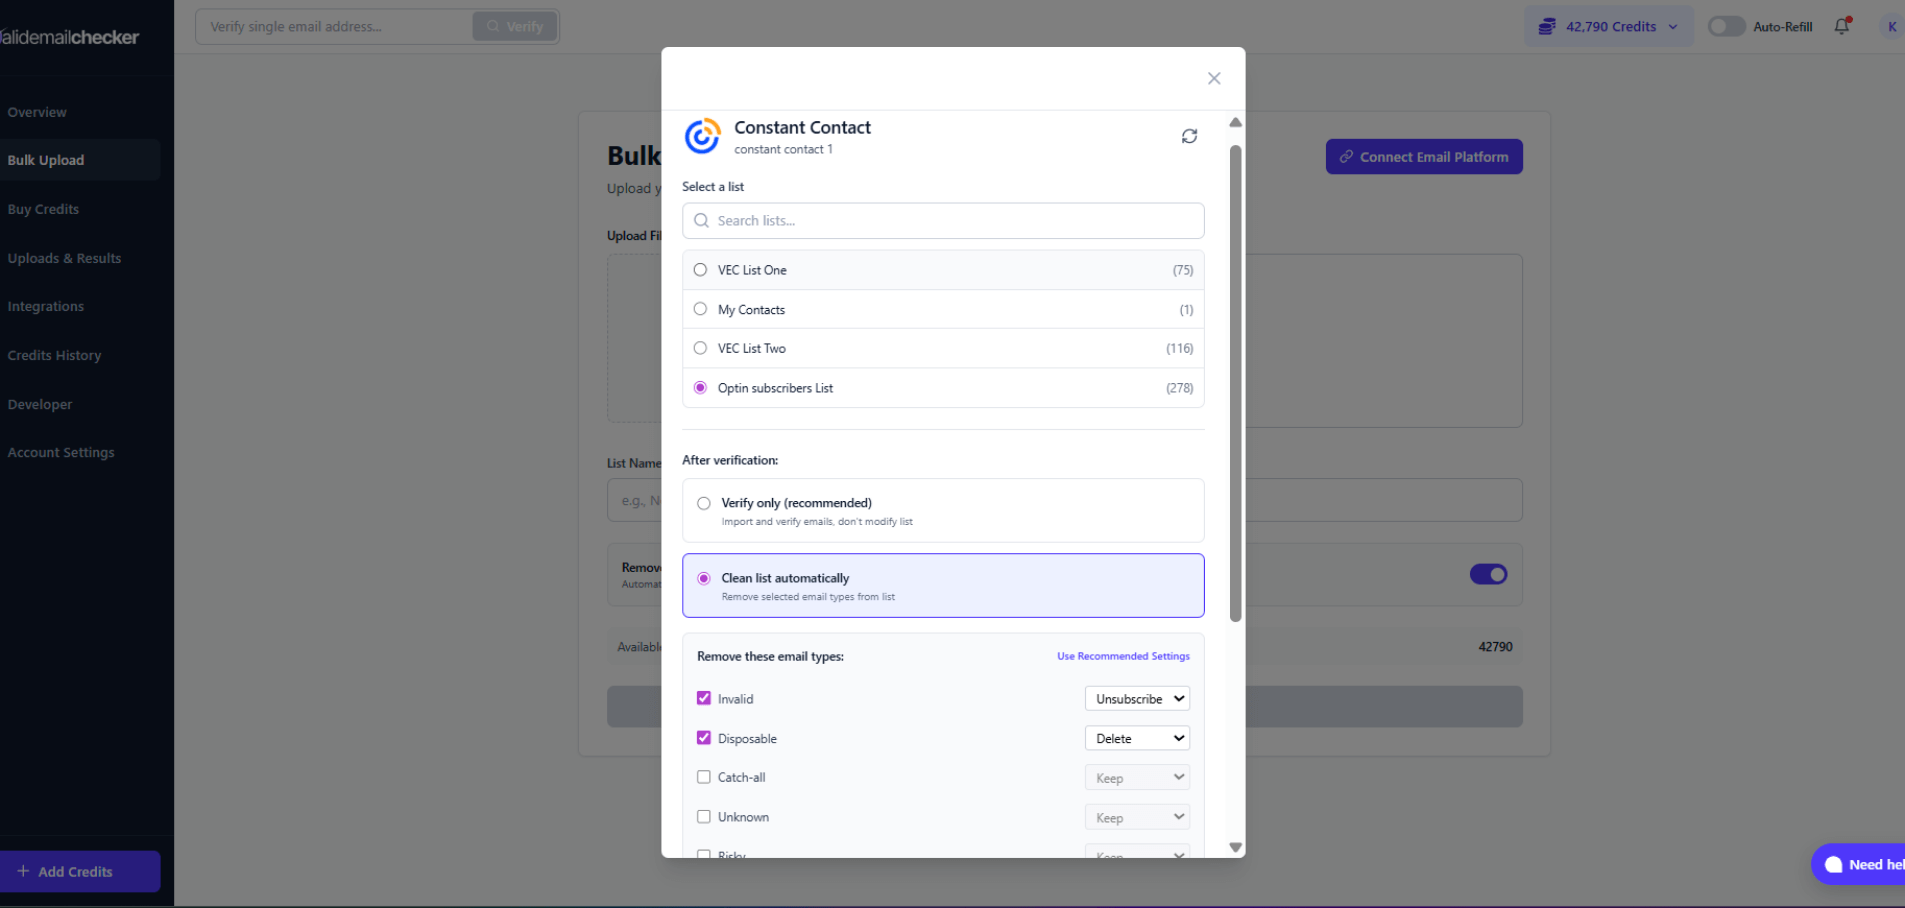
You'll see all your Constant Contact lists with their contact counts. Select the list you want to verify.
Choosing Your Verification Mode
You have two options for what happens after verification:
Option A: Verify Only
Select Verify only to import and verify emails without making any changes to your Campaign Monitor list.
- Emails are imported and verified
- Your Campaign Monitor list stays exactly as it is
- You review results and decide what to do
- Best for: First-time users, cautious cleaners, compliance requirements
Option B: Clean List Automatically
Select Clean list automatically to have bad emails removed from your Campaign Monitor list after verification.
When you choose this option, you can customize exactly what happens to each email type:
| Email Type | Available Actions | Default |
|---|---|---|
| Invalid | Unsubscribe, Delete, Keep | Unsubscribe |
| Disposable | Unsubscribe, Delete, Keep | Delete |
| Catch-all | Unsubscribe, Delete, Keep | Keep |
| Unknown | Unsubscribe, Delete, Keep | Keep |
| Risky | Unsubscribe, Delete, Keep | Keep |
Understanding the Actions:
- Unsubscribe — Marks the subscriber as unsubscribed in Campaign Monitor. They remain in your list but won't receive emails. Good for compliance and record-keeping.
- Delete — Permanently removes the subscriber from your Campaign Monitor list. They're gone completely.
- Keep — Does nothing. The subscriber stays active in your list.
Automatic cleaning can't be undone. If you're not sure, start with Verify only and clean manually after reviewing the results.
Starting Verification
- Select your list
- Choose verification mode
- If using automatic cleaning, configure your preferences
- Click Import List to start
Monitoring Verification
Tracking Progress
After starting verification, you will be redirected to Uploads & Results to monitor progress:
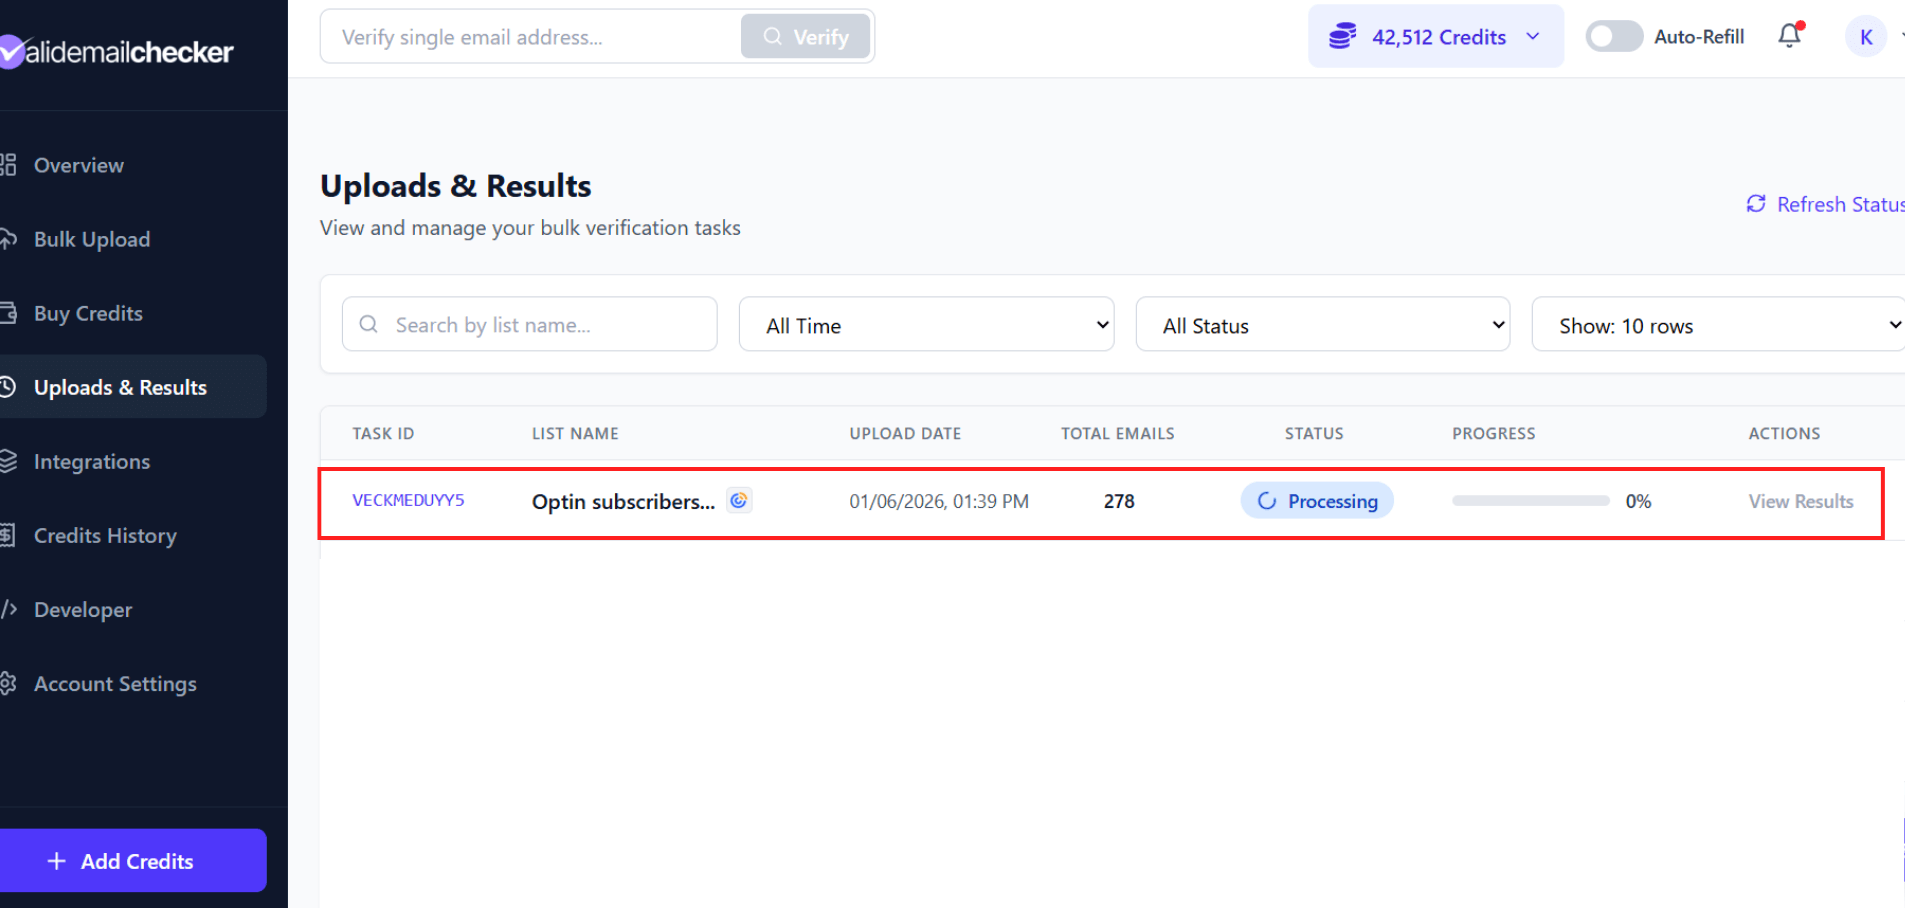
Your Constant Contact verifications appear alongside other verification tasks.
What you'll see:
| Column | Description |
|---|---|
| Task ID | Unique identifier for this verification |
| List Name | The name of your Campaign Monitor list |
| Upload Date | When you started the verification |
| Total Emails | Number of contacts being verified |
| Status | Current state (Processing, Completed, etc.) |
| Progress | Percentage complete with progress bar |
| Actions | View Results, Delete |
The page updates automatically—no need to refresh. You'll see the percentage progress increase as verification continues.
Status meanings:
- 🔄 Processing — Verification in progress
- ✅ Completed — All done! Click "View Results" to see the breakdown
- ⚠️ Completed with Warning — Finished, but some emails couldn't be processed (credits refunded)
- ❌ Failed — Something went wrong (rare)
- 🗑️ Deleted — Results removed after 15-day retention period
Once verification completes, click View Results to see the breakdown.
Managing Your Connection
Viewing Connected Accounts
Go to Integrations in the sidebar to see all your connected accounts:
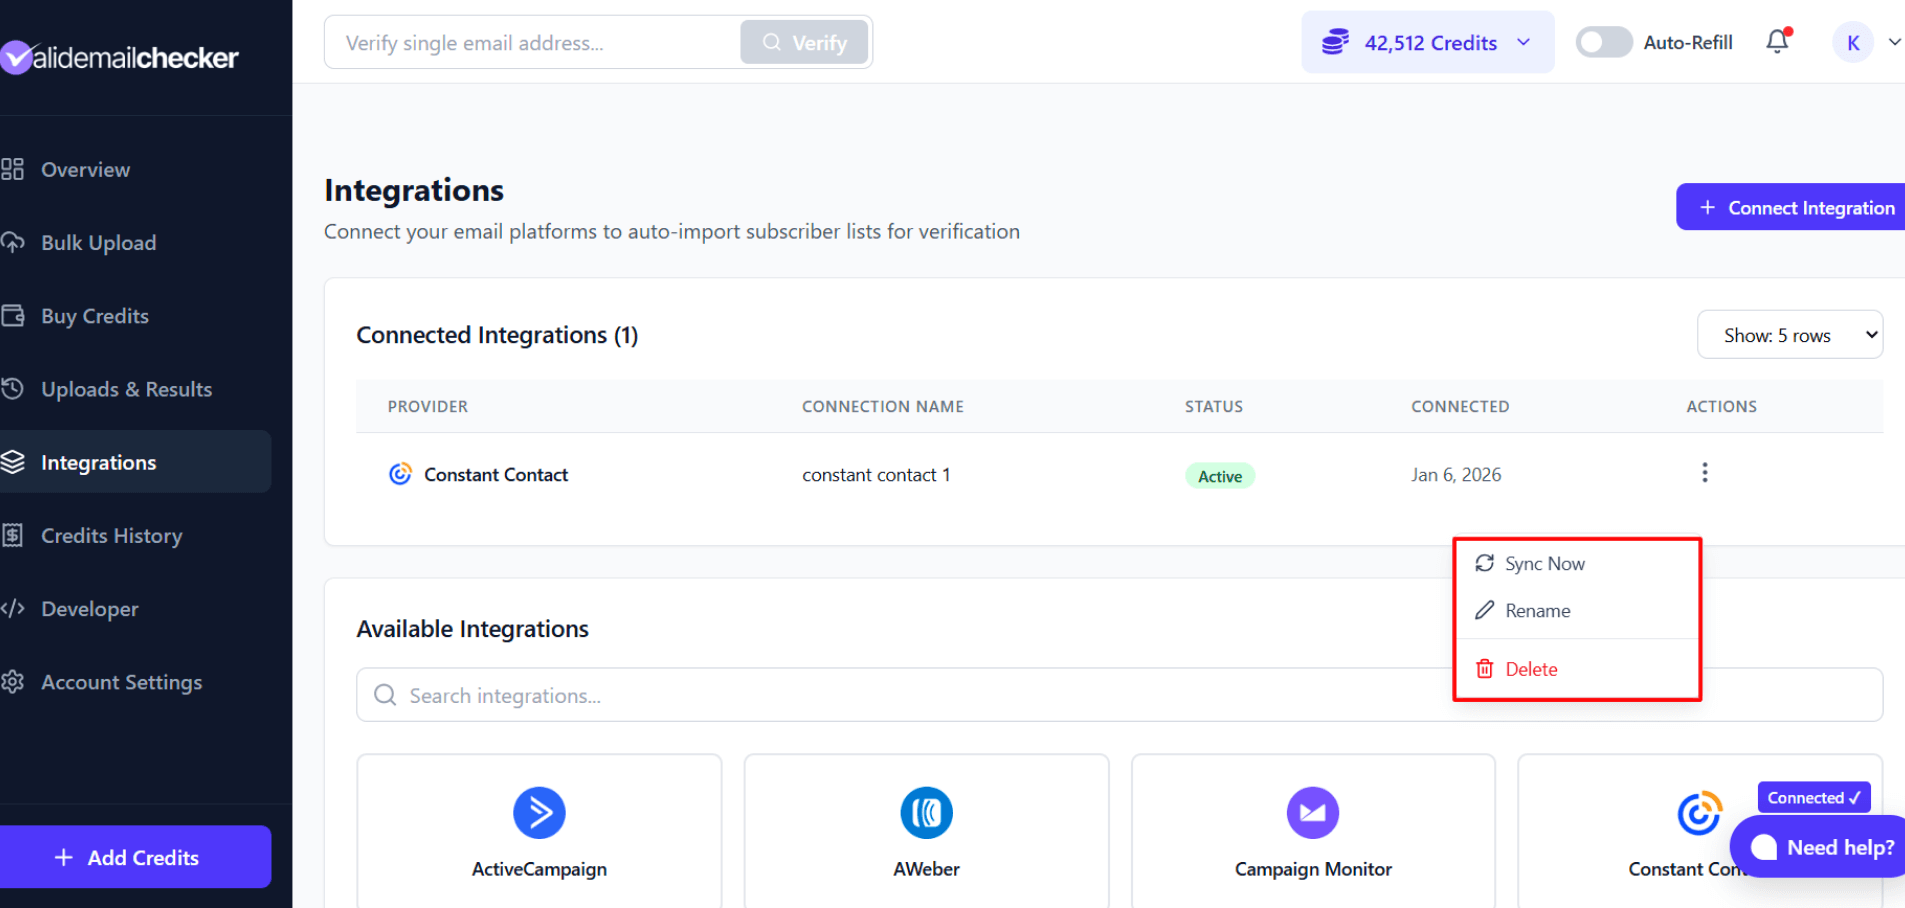
Available Actions
Click the three-dot menu on any connection to:
- Sync Now - Pull latest lists and start a new verification
- Rename - Change the connection name
- Delete - Remove the connection (doesn't affect your Constant Contact data)
Using Multiple Accounts
Have multiple Constant Contact accounts? No problem.
Adding Another Account
- Go to Bulk Upload → Connect Email Platform
- Select Constant Contact
- You'll see your existing connections
- Click + Add Another Account
- Follow the same OAuth process with your other Constant Contact account
Managing Multiple Connections
Give each connection a clear name like:
- "Main Business Account"
- "Client - ABC Company"
- "Newsletter Account"
This makes it easy to identify which account you're working with.
Troubleshooting
Connection Failed
Problem: OAuth authorization didn't complete
Solutions:
- Make sure pop-ups aren't blocked in your browser
- Try a different browser
- Clear your browser cache and cookies
- Ensure you're logged out of Constant Contact, then try again
Lists Not Showing
Problem: Your Constant Contact lists aren't appearing
Solutions:
- Click the refresh icon to reload lists
- Ensure your lists have at least one contact
- Check that your Constant Contact account is in good standing
- Disconnect and reconnect if the issue persists
Verification Failed
Problem: Verification shows "Failed" status
Solutions:
- Check your Valid Email Checker credit balance
- Ensure your Constant Contact connection is still active
- Try verifying a smaller list first
- Contact our support if the problem continues
Authorization Expired
Problem: Connection shows as disconnected or expired
Solution: OAuth tokens can expire. Simply delete the connection and reconnect using the same process.
Best Practices
For Email Marketers
- Verify before major campaigns - Clean your list before sending important emails
- Start with "Verify Only" - Review results before enabling automatic cleaning
- Regular maintenance - Verify monthly to keep bounce rates low
- Segment strategically - Consider verifying your most engaged segments first
For Automatic Cleaning
- Be conservative with catch-alls - Many catch-all addresses are valid; consider keeping them
- Use "Unsubscribe" over "Delete" - Preserves records for compliance
- Test with a small list first - Verify a small list with automatic cleaning to see how it works
- Document your settings - Remember which cleaning rules you've applied
Frequently Asked Questions
Does this affect my Constant Contact campaigns?
Only if you use automatic cleaning. "Verify Only" mode just checks your emails - it doesn't change anything in Constant Contact.
Can I verify all my lists at once?
Currently, you verify one list at a time. This gives you more control over the process and lets you apply different cleaning rules to different lists.
Will removed contacts be notified?
No. Unsubscribing or deleting contacts through Valid Email Checker doesn't send any emails to those contacts.
What happens to my existing Constant Contact segments?
Segments are based on your lists. If you remove a contact from a list, they'll be removed from any segments based on that list.
Can I undo automatic cleaning?
No - removed or unsubscribed contacts can't be restored through Valid Email Checker. This is why we recommend starting with "Verify Only" mode.
Next Steps
- Understanding Verification Results - Learn what each status means
- Downloading Results - Export your verification data
- Integrations Overview - Connect other email platforms