HubSpot Integration
Connect your HubSpot CRM to Valid Email Checker and verify your contact lists without exporting a single file. Keep your CRM data clean, improve your email deliverability, and protect your sender reputation.
What You Can Do
With the HubSpot integration, you can:
- Import contact lists directly from HubSpot for verification
- Verify all contacts or specific lists/segments
- Auto-clean your lists by removing or unsubscribing bad emails
- Connect multiple HubSpot accounts (great for agencies)
- Keep lists synced with on-demand refresh
No file exports. No manual uploads. Just connect and verify.
Before You Start
Make sure you have:
- A Valid Email Checker account with available credits
- A HubSpot account (Free, Starter, Professional, or Enterprise)
- Admin or Super Admin permissions in HubSpot (to authorize third-party apps)
HubSpot uses secure OAuth authentication. You don't need to find or copy any API keys - just click connect and authorize access directly in HubSpot.
Connecting Your HubSpot Account
Step 1: Start the Connection
You can connect HubSpot from two places:
Option A: From Integrations page
- Click Integrations in the left sidebar
- Find HubSpot in the Available Integrations section
- Click on the HubSpot card
Option B: From Bulk Upload page
- Click Bulk Upload in the left sidebar
- Click Connect Email Platform button
- Select HubSpot from the list
Step 2: Name Your Connection
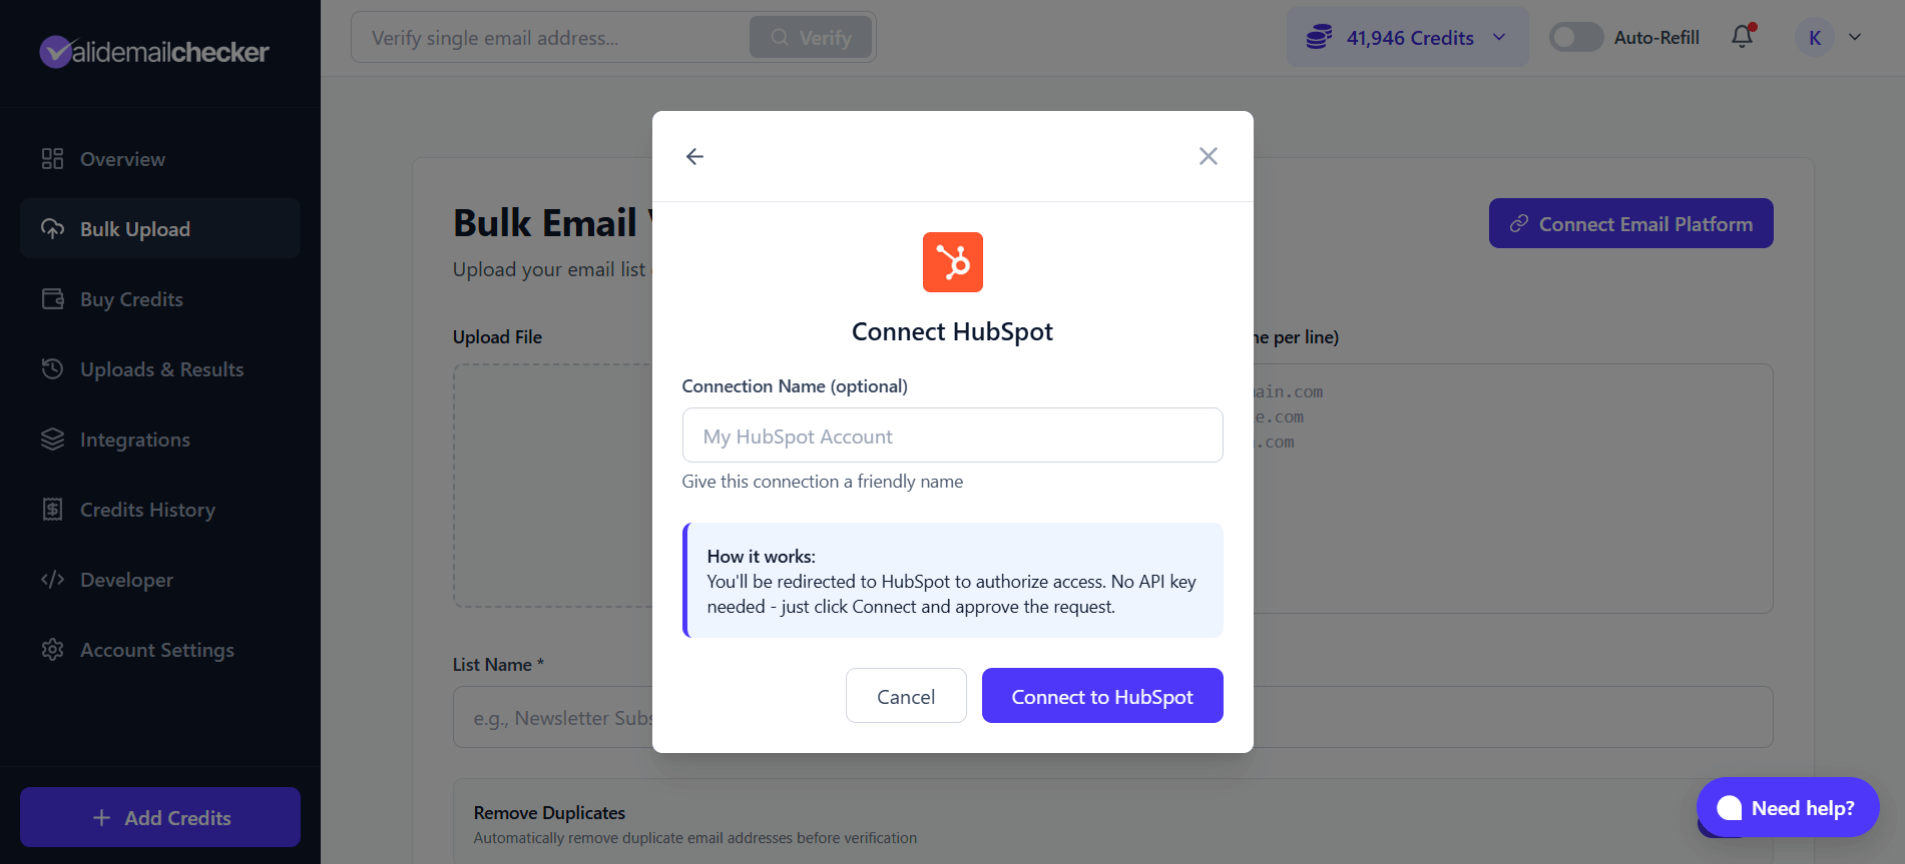
In the connection modal:
- Connection Name (optional) - Give this connection a friendly name like "Marketing HubSpot" or "Client ABC HubSpot". Default is "My HubSpot Account"
- Notice the "How it works" info box - you'll be redirected to HubSpot to authorize access
- Click Connect to HubSpot
Step 3: Authorize in HubSpot
You'll be redirected to HubSpot's authorization page:
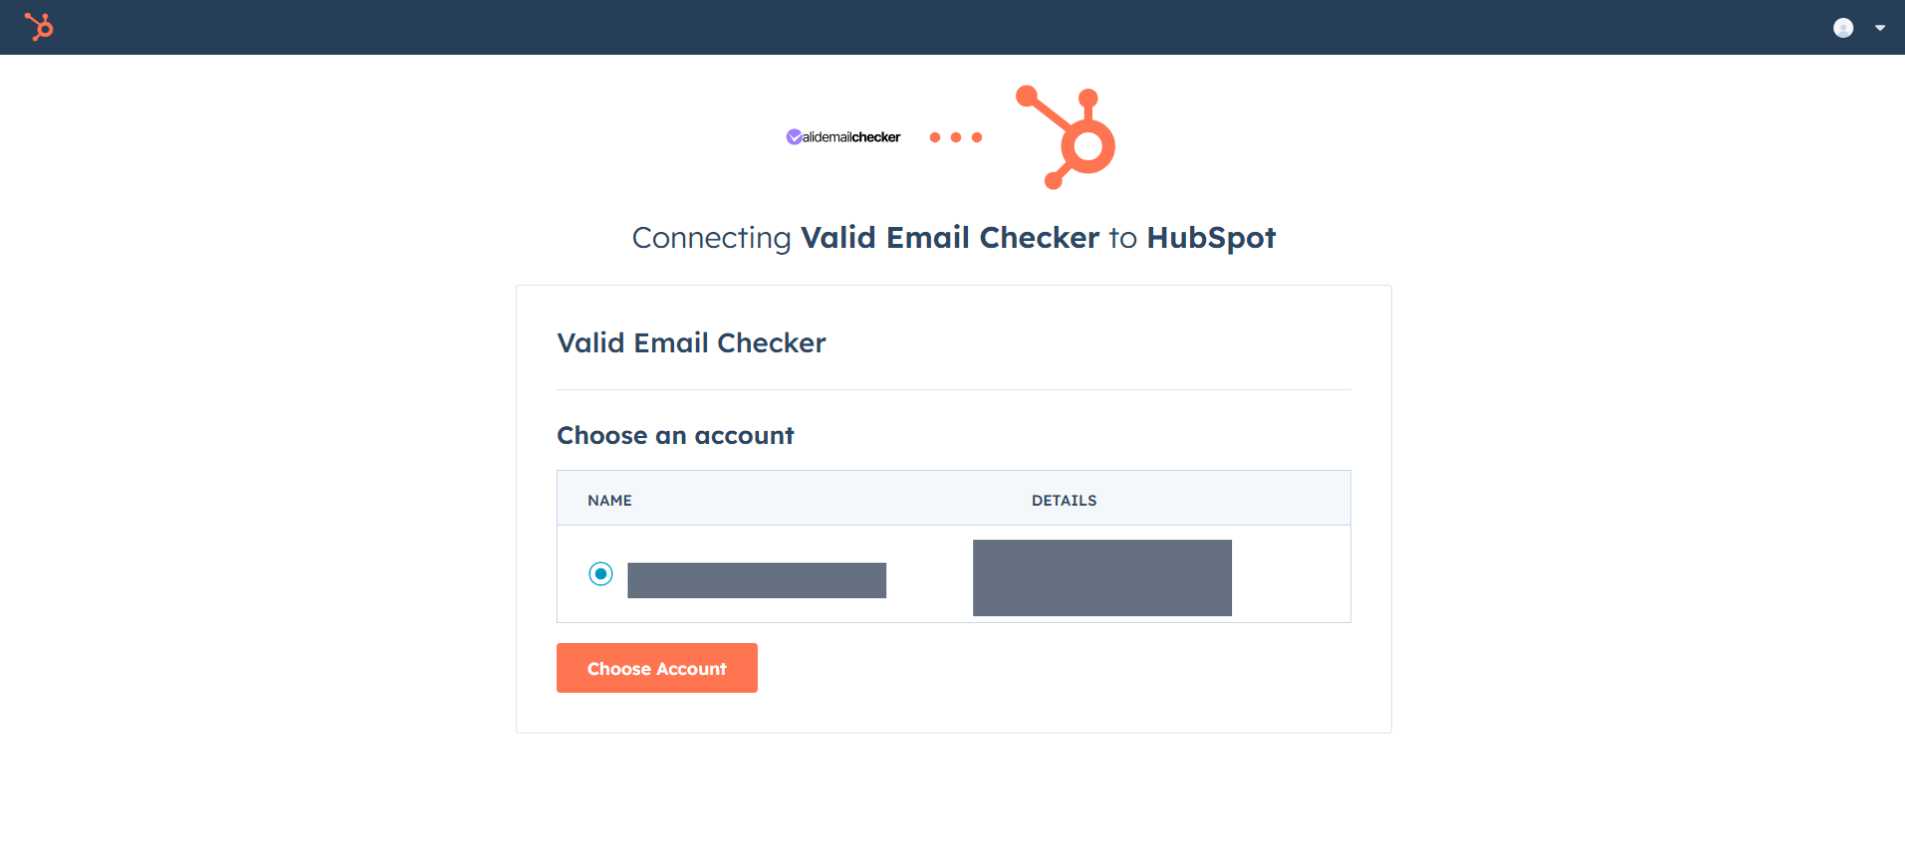
- If you have multiple HubSpot accounts, select the one you want to connect
- Review the permissions Valid Email Checker is requesting
- Click Choose Account to authorize
You'll be redirected back to Valid Email Checker automatically.
Valid Email Checker requests read access to your contacts and lists so we can import them for verification. We never modify your HubSpot data unless you explicitly choose the "Clean list automatically" option.
Step 4: Connection Complete
Once authorized, your HubSpot account is connected and ready to use. Your contact lists will sync automatically.
Verifying Your HubSpot Contacts
Step 1: Select Your List
After connecting, you'll see your HubSpot lists:
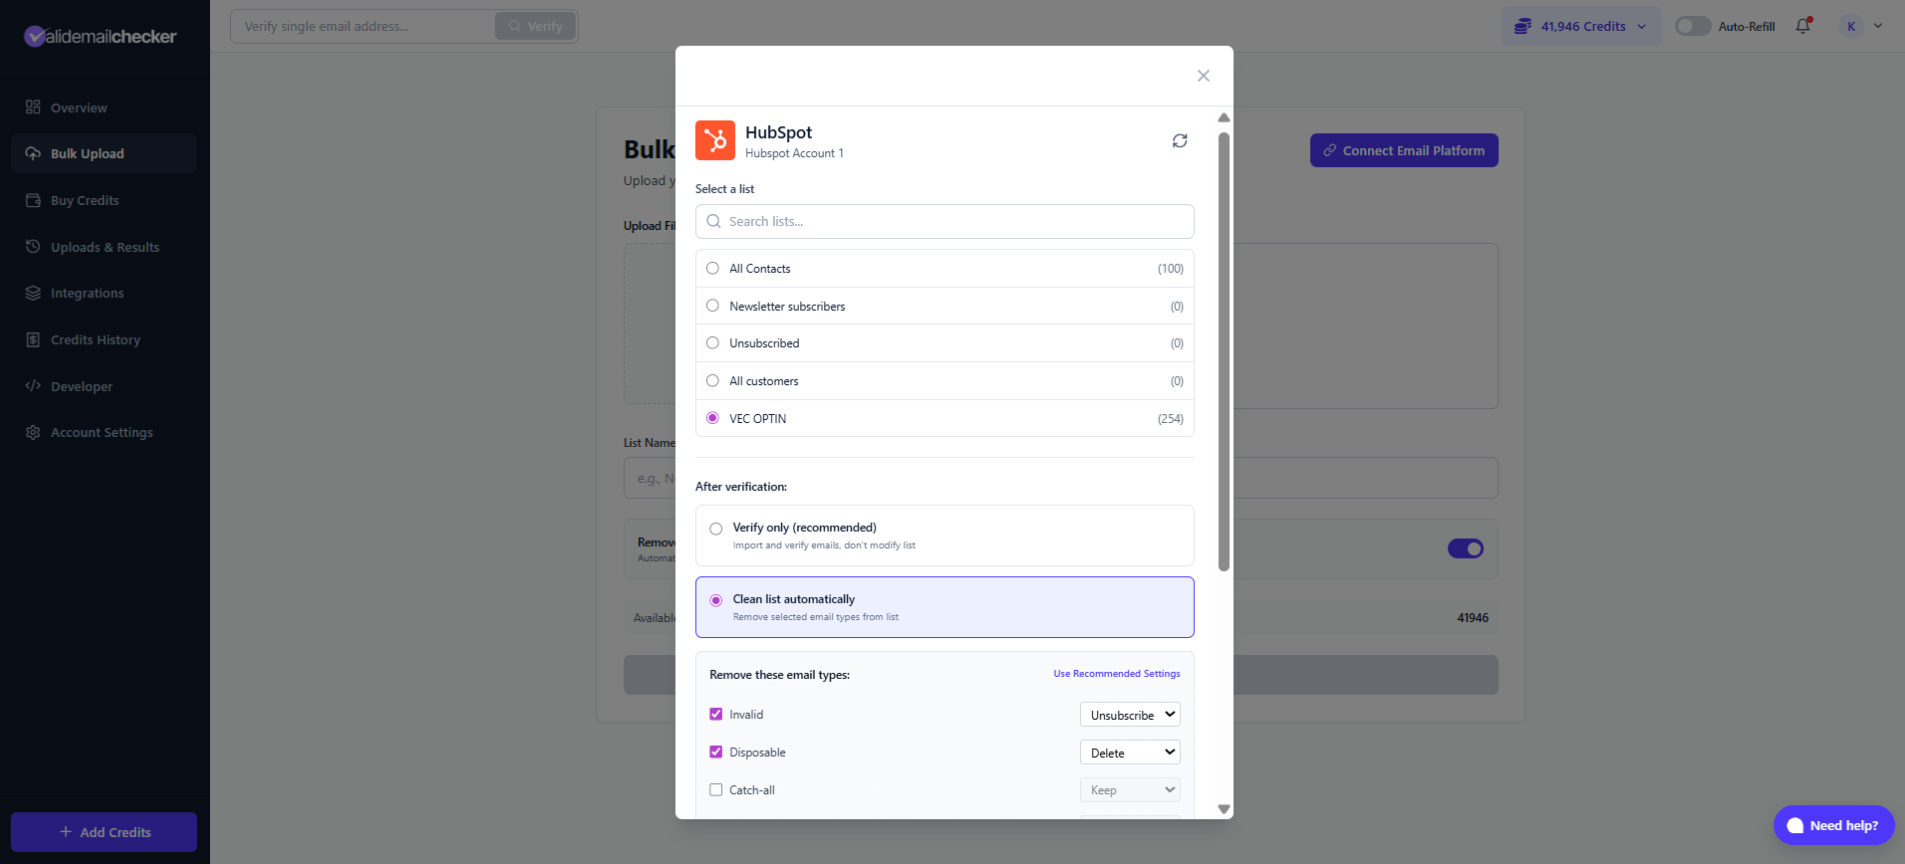
- Search lists - Use the search box to find specific lists
- Select a list - Click on the list you want to verify (subscriber count shown)
- Choose your verification approach (see below)
Your HubSpot lists include:
- All Contacts - Your entire contact database
- Static lists - Manually curated contact lists
- Active lists - Dynamic lists based on filters/criteria
Step 2: Choose Your Verification Approach
You have two options:
Option A: Verify Only
Select Verify only to:
- Import and verify all emails in the list
- Get detailed results for each contact
- Review results before taking any action
- Download results for your records
Your HubSpot list remains unchanged. You decide what to do with the results.
Option B: Clean List Automatically
Select Clean list automatically to have Valid Email Checker automatically update your HubSpot contacts based on verification results.
Configure what happens to each email type:
| Email Type | Options | Default |
|---|---|---|
| Invalid | Keep / Unsubscribe / Delete | Unsubscribe |
| Disposable | Keep / Unsubscribe / Delete | Delete |
| Catch-all | Keep / Unsubscribe / Delete | Keep |
| Unknown | Keep / Unsubscribe / Delete | Keep |
| Risky | Keep / Unsubscribe / Delete | Keep |
- Keep - Contact stays in your list unchanged
- Unsubscribe - Contact is unsubscribed from marketing emails but remains in your CRM
- Delete - Contact is removed from the list entirely
Step 3: Start Verification
Click Import List to start
You'll be redirected to the Uploads & Results page.
Monitoring Verification Progress
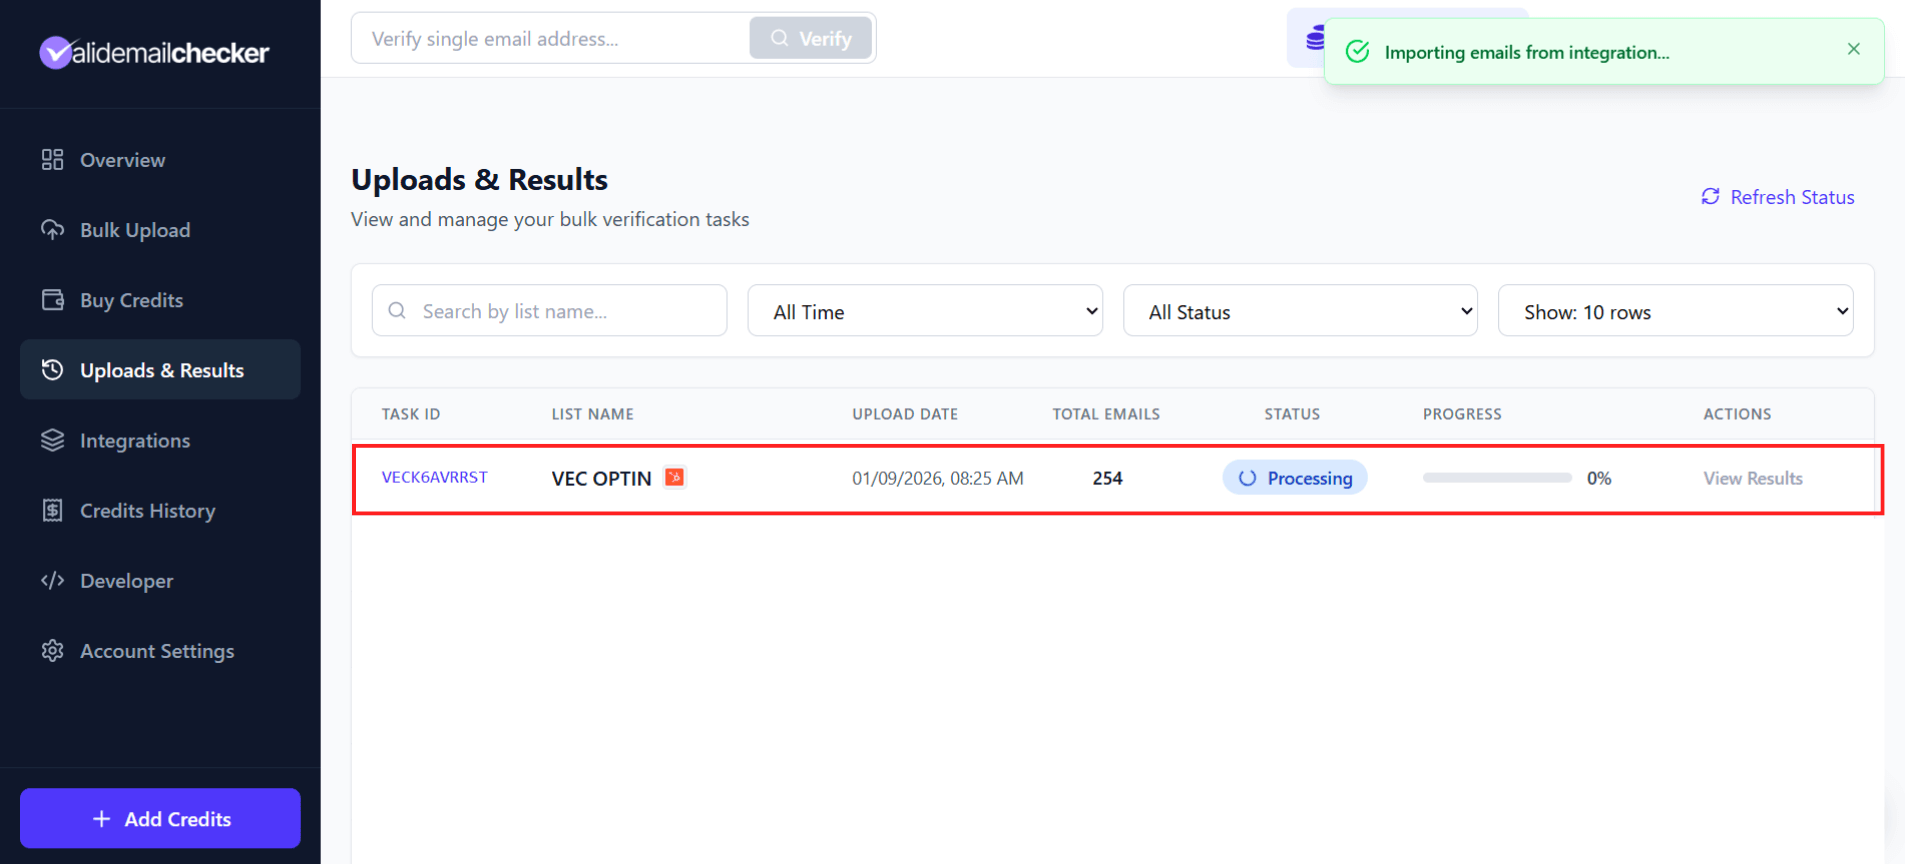
Track your verification in real-time:
| Column | Description |
|---|---|
| Task ID | Unique identifier (e.g., VECK6AVRRST) |
| List Name | Your list name with HubSpot icon |
| Upload Date | When verification started |
| Total Emails | Number of contacts being verified |
| Status | Processing, Completed, Failed, or Deleted |
| Progress | Percentage complete |
| Actions | View Results when done |
Estimated Verification Times
| List Size | Estimated Time |
|---|---|
| 100 emails | Seconds |
| 1,000 emails | 1-2 minutes |
| 10,000 emails | 5-10 minutes |
| 100,000 emails | 15-30 minutes |
| 1,000,000 emails | 1-2 hours |
The page updates automatically - no need to refresh.
Managing Your HubSpot Connection
Viewing Connected Accounts
Go to Integrations in the sidebar to see all your connected accounts:
Each connection shows:
- Provider - HubSpot
- Connection Name - Your custom name
- Status - Active or Disconnected
- Connected - When you connected
- Actions - Management options
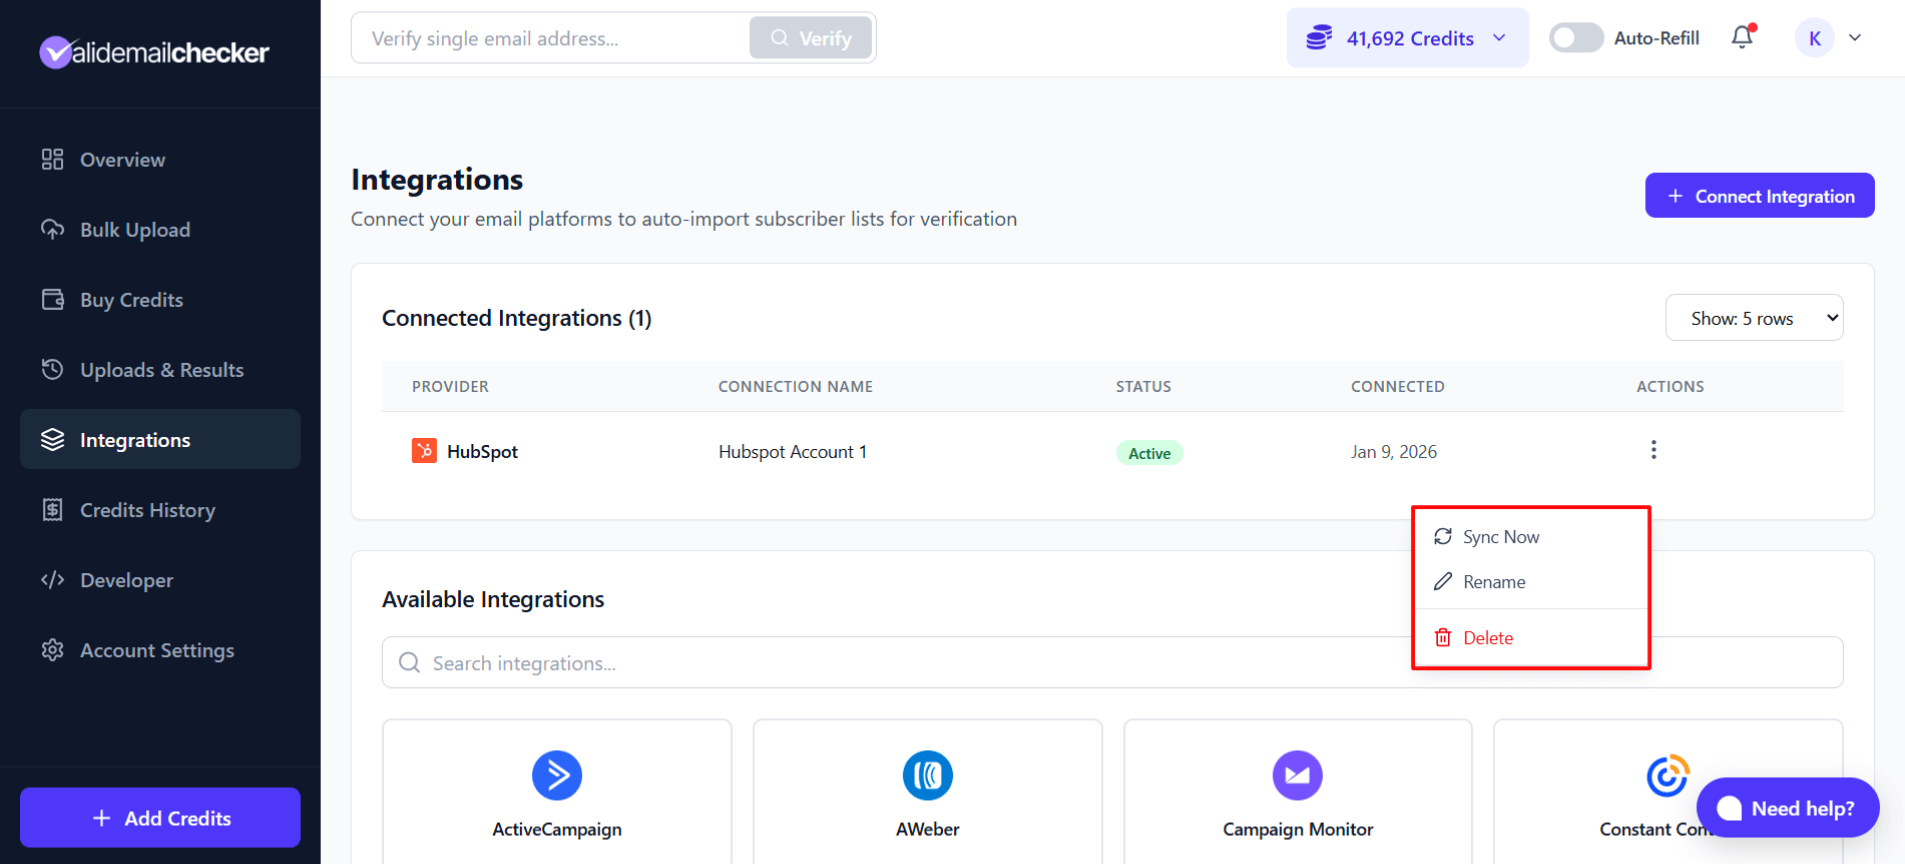
Managing a Connection
Click the three-dot menu on any connection for options:
| Action | What It Does |
|---|---|
| Sync Now | Refresh your lists from HubSpot immediately |
| Rename | Change the connection name |
| Delete | Remove this connection entirely |
When to Sync
Your lists sync automatically when you connect. Use Sync Now when:
- You've added new contacts to HubSpot
- You've created new lists
- You want to see updated subscriber counts
- Lists aren't appearing as expected
Connecting Multiple HubSpot Accounts
Running an agency? Managing multiple HubSpot portals? No problem.
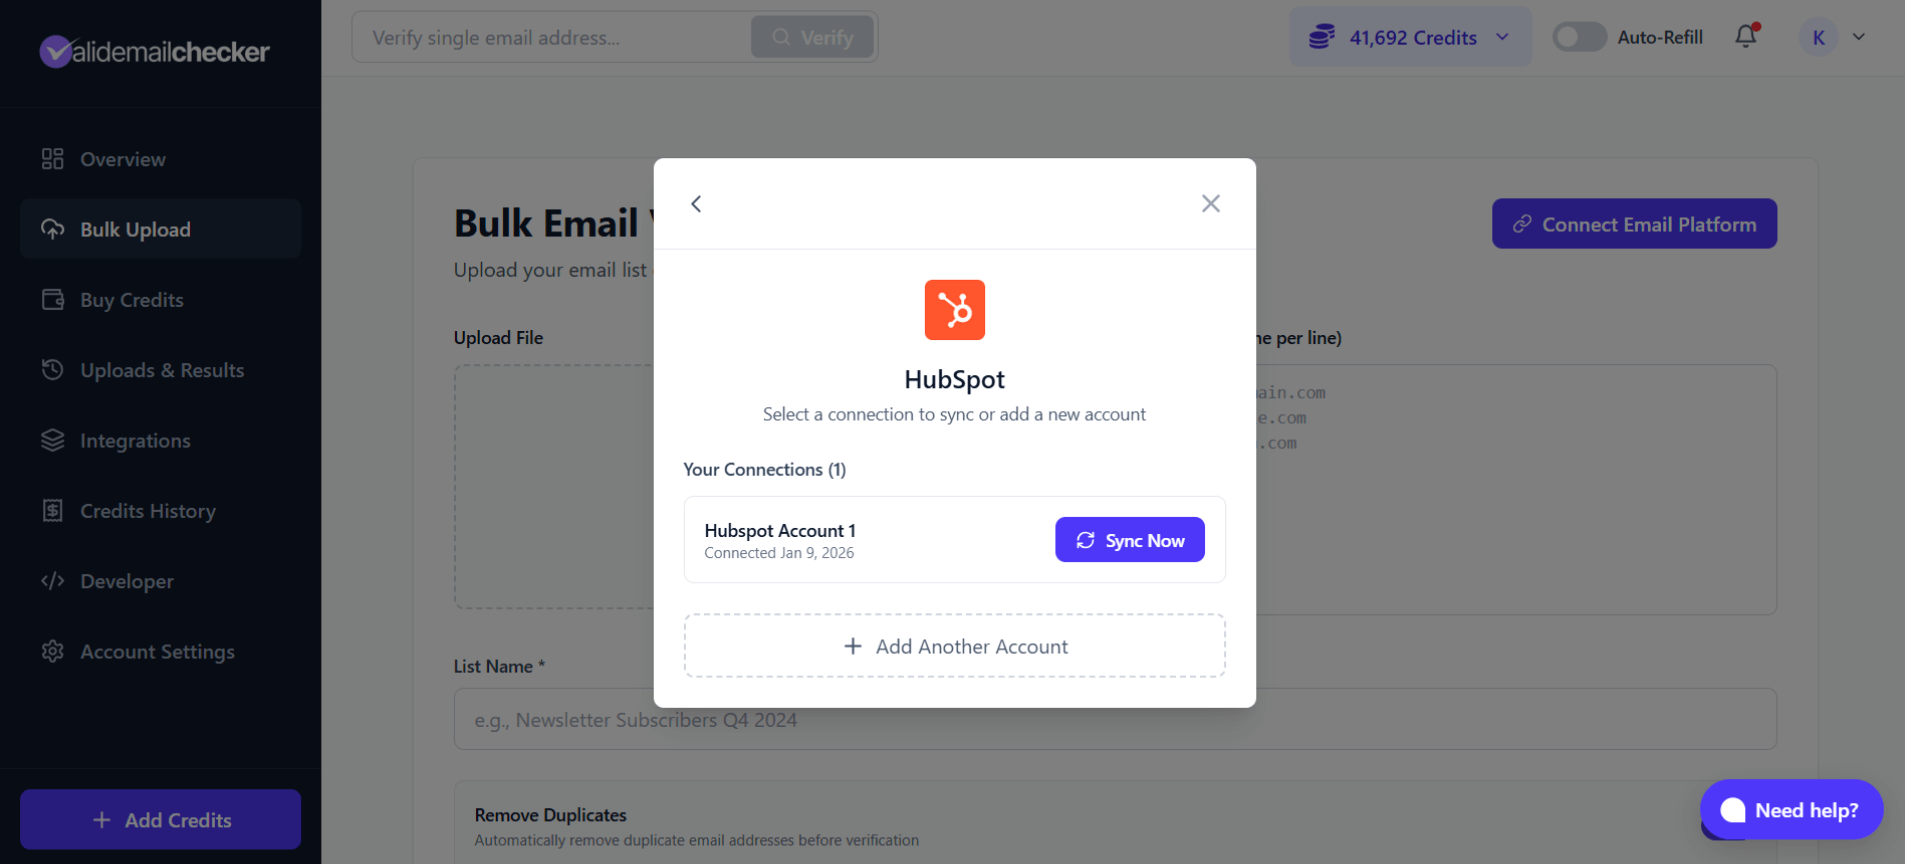
Adding Another Account
- Go to Bulk Upload and click Connect Email Platform
- Select HubSpot
- You'll see your existing connections
- Click + Add Another Account
- Give it a unique name (e.g., "Client XYZ HubSpot")
- Complete the OAuth authorization for the new account
Managing Multiple Accounts
When you have multiple HubSpot accounts:
- Each appears as a separate connection in Integrations
- Select the specific account when starting a verification
- Use clear naming to keep track (client names, departments, etc.)
HubSpot-Specific Tips
Best Practices
- Start with "All Contacts" - Get a baseline of your entire CRM health
- Use Unsubscribe over Delete - Preserve your CRM history and contact records
- Verify new imports first - Check purchased or imported lists before they pollute your CRM
- Create a verification segment - Make an active list of unverified contacts for regular cleaning
Understanding HubSpot Contacts
HubSpot stores more than just email addresses. When you verify:
- Only the email field is checked
- Other contact properties (name, company, etc.) remain unchanged
- Contact activity history is preserved
Working with Active Lists
Active lists in HubSpot are dynamic - contacts can enter or leave based on criteria. Keep in mind:
- Verify active lists periodically as they change
- Consider creating a static list snapshot for verification
- Results reflect the list at the moment of verification
Troubleshooting
Connection Issues
| Problem | Solution |
|---|---|
| Can't connect to HubSpot | Make sure you have Admin permissions in HubSpot |
| Authorization failed | Try logging into HubSpot directly first, then reconnect |
| Wrong account connected | Delete the connection and reconnect with the correct account |
| Connection shows "Disconnected" | Re-authorize by clicking on the connection |
List Issues
| Problem | Solution |
|---|---|
| Lists not showing | Click Sync Now to refresh |
| List shows 0 contacts | Check that contacts have email addresses in HubSpot |
| Missing some lists | Only lists you have access to in HubSpot will appear |
| "All Contacts" is huge | Consider verifying specific lists instead |
Verification Issues
| Problem | Solution |
|---|---|
| Verification stuck | Check the Uploads & Results page for status |
| Some emails failed | Partial failures may occur - you can retry unprocessed emails |
| Results not syncing back | Ensure you selected "Clean list automatically" |
Frequently Asked Questions
Does Valid Email Checker modify my HubSpot data?
Only if you choose "Clean list automatically" and select Unsubscribe or Delete actions. With "Verify only," your HubSpot data remains completely unchanged.
What HubSpot plans are supported?
All HubSpot plans work - Free, Starter, Professional, and Enterprise. You just need permission to authorize third-party apps.
Can I verify contacts in HubSpot workflows?
Not directly through our integration. However, you can:
- Create a list of contacts that enter specific workflows
- Verify that list periodically
- Use the results to update your workflow criteria
How often should I verify my HubSpot contacts?
We recommend:
- Monthly for active marketing lists
- Quarterly for your entire database
- Before every major campaign for critical sends
- Immediately for newly imported contacts
Will this affect my HubSpot email sending limits?
No. Valid Email Checker verifies emails independently - we don't send any emails through HubSpot or count against your sending limits.
Can team members use this integration?
Yes! Team members in Valid Email Checker can use connected integrations. However, only the account owner can add or remove connections.
Next Steps
- Understanding Verification Results - Learn what each status means
- Downloading Results - Export your verification data
- Credit System - Understand how credits work
Need Help?
Having trouble with your HubSpot integration? We're here to help:
- Live Chat - Click the chat bubble in the bottom right
- Email - support@validemailchecker.com
- Contact Form - validemailchecker.com/contact-us