Mailchimp Integration
Mailchimp is one of the most popular email marketing platforms out there, and for good reason. But even the best platform can't save you from bounces if your list has bad emails lurking in it.
With Valid Email Checker's Mailchimp integration, you can verify your entire audience directly from your dashboard—no exports, no imports, no spreadsheet gymnastics. Just connect, verify, and you're done.
What You Can Do
Once you connect Mailchimp to Valid Email Checker, you can:
- Import any audience or list directly for verification
- Verify emails without affecting your Mailchimp contacts
- Auto-clean lists by removing or unsubscribing bad emails automatically
- Remove duplicates before verification to save credits
- Connect multiple Mailchimp accounts if you manage several
- Track verification progress in real-time
Before You Start
Make sure you have:
| Requirement | Details |
|---|---|
| Mailchimp account | Any plan works (Free, Essentials, Standard, Premium) |
| Admin or Owner access | You need permission to create API keys |
| Valid Email Checker credits | 1 credit per email verified |
| At least one audience | You'll need contacts to verify |
Finding Your Mailchimp API Key
Mailchimp uses API keys for integrations. Here's how to get yours:
Step 1: Go to Your Profile
- Log in to your Mailchimp account
- Click your profile icon in the bottom-left corner
- Select Profile from the menu
Step 2: Navigate to API Keys
- Click Extras in the top navigation
- Select API keys from the dropdown
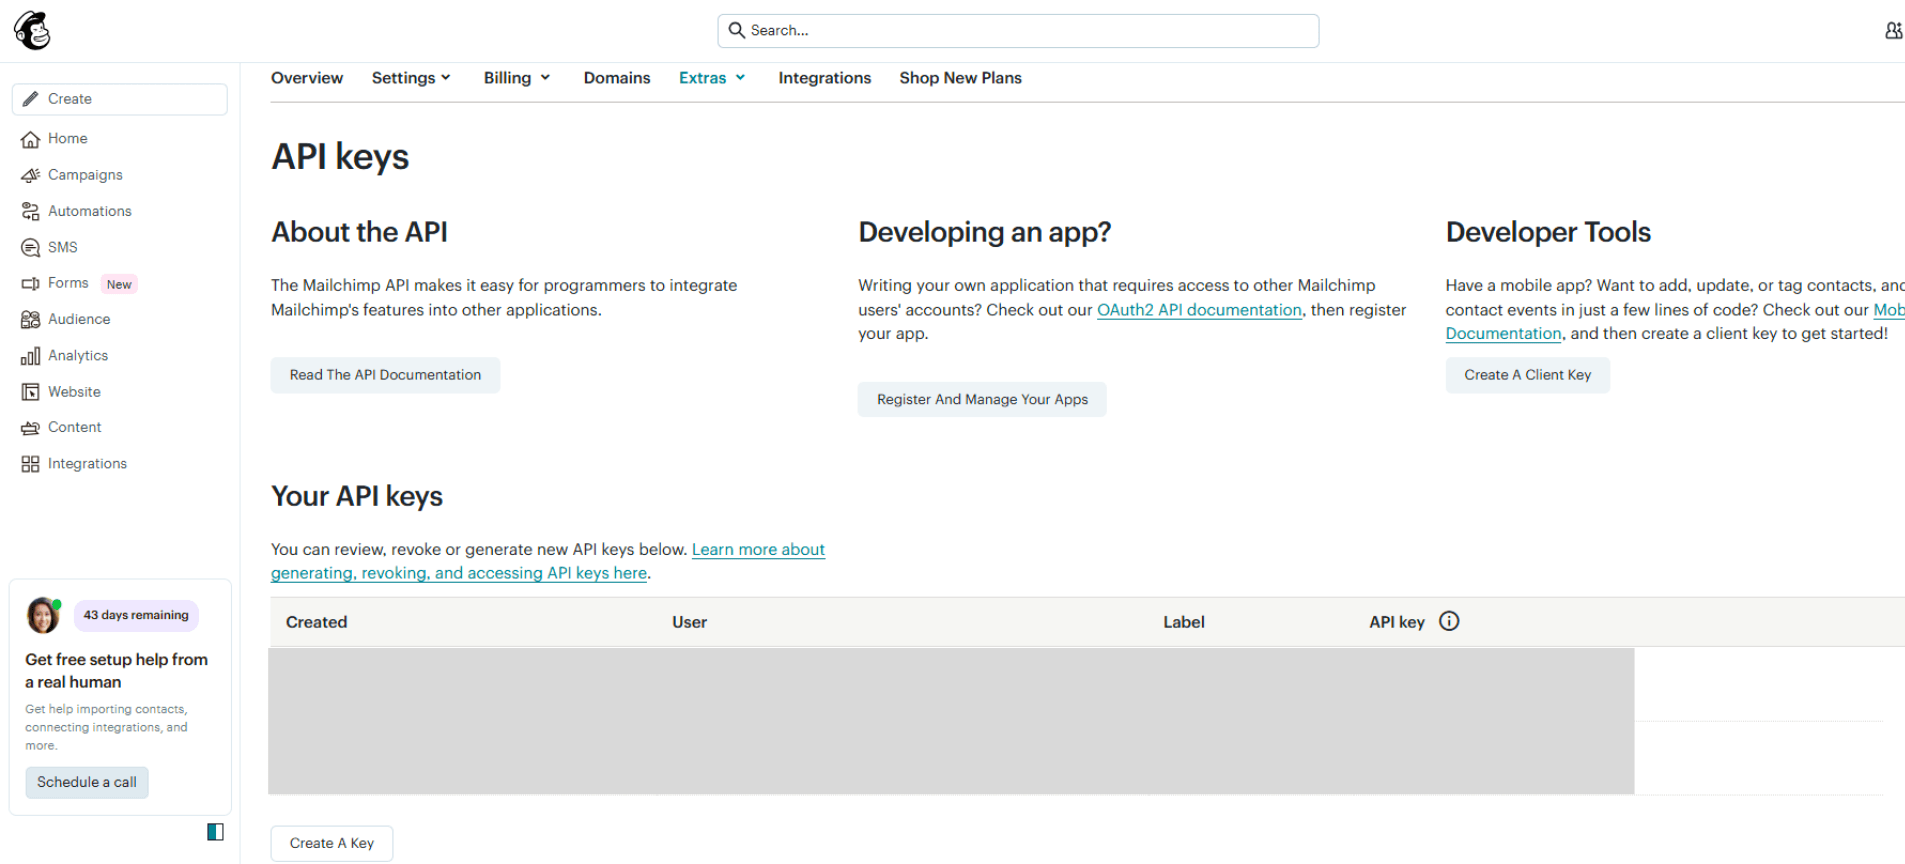
Step 3: Create a New API Key
- Scroll down to the Your API keys section
- Click Create A Key
- Give your key a descriptive name (like "Valid Email Checker Integration")
- Click Generate Key
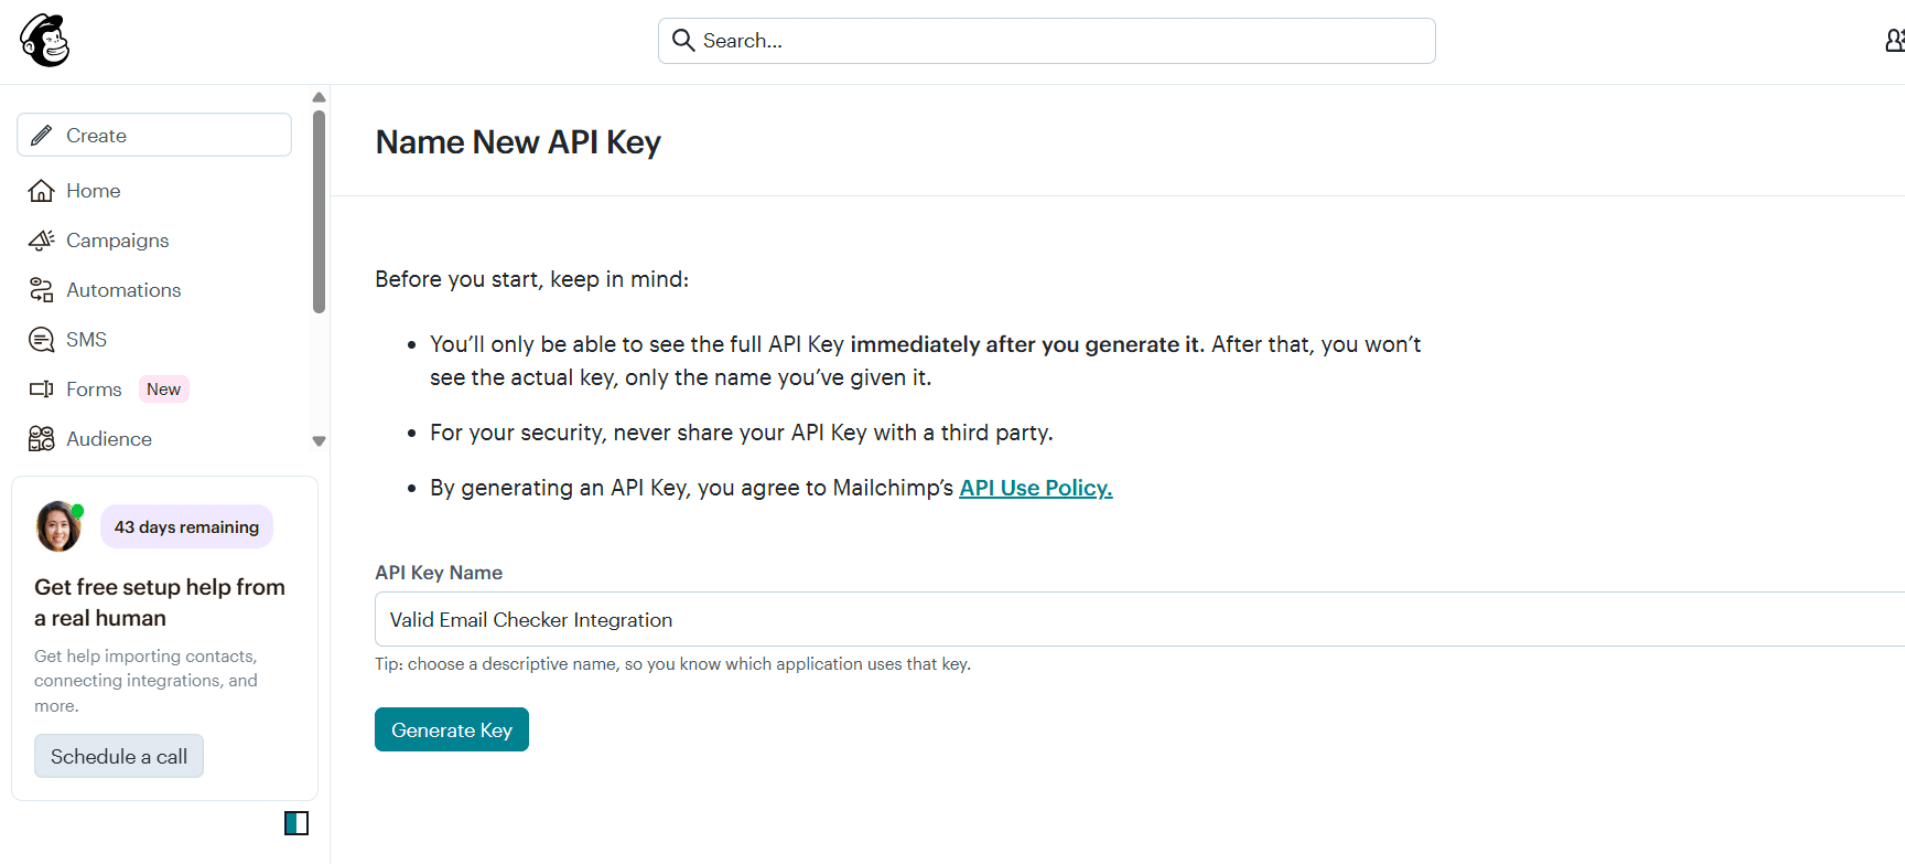
Mailchimp only shows your full API key once—right after you create it. After that, you'll only see the key's name. If you lose it, you'll need to create a new one.
Step 4: Copy the Full API Key
Your API key will look something like this:
a1b2c3d4e5f6g7h8i9j0k1l2m3n4o5p6-us21
Important: Copy the entire key, including the part after the hyphen (like -us21). That suffix identifies your Mailchimp data center and is required for the connection to work.
Connecting Mailchimp to Valid Email Checker
Now let's connect your account:
Step 1: Open the Integration Modal
- Log in to your Valid Email Checker dashboard
- Click Bulk Upload in the sidebar
- Click the Connect Email Platform button
- Find and click Mailchimp from the list
Step 2: Enter Your Details
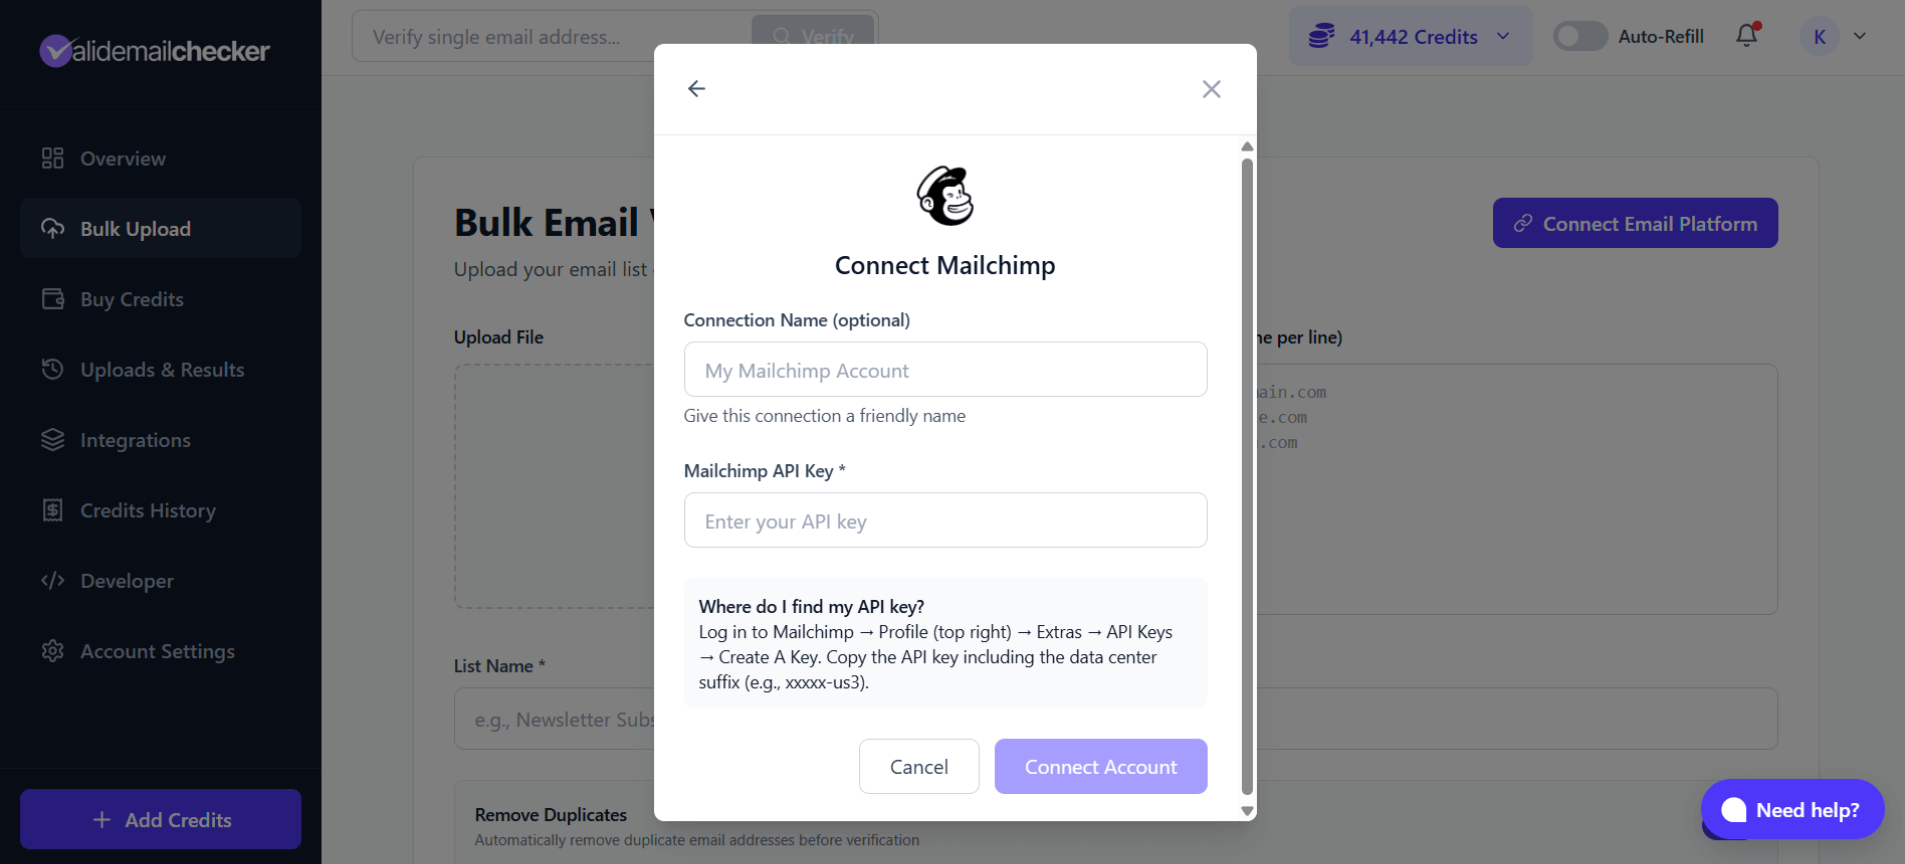
Fill in the connection form:
| Field | What to Enter |
|---|---|
| Connection Name | Optional. A friendly name like "Main Marketing Account" |
| Mailchimp API Key | Paste your full API key (including the data center suffix) |
Step 3: Connect
Click Connect Account. Valid Email Checker will verify your API key and establish the connection.
If successful, you'll see your Mailchimp audiences available for verification.
Verifying Your Mailchimp Lists
Once connected, here's how to verify your contacts:
Step 1: Select Your List
After connecting (or clicking Sync Now on an existing connection), you'll see your Mailchimp audiences:

- Use the search bar to find specific audiences
- Each list shows the contact count in parentheses
- Click to select the audience you want to verify
Step 2: Choose Your Verification Mode
You have two options:
Option A: Verify Only
Select Verify only to:
- Import and verify all emails
- See results without changing your Mailchimp list
- Decide what to do with bad emails after reviewing results
Option B: Clean List Automatically
Select Clean list automatically to take action on bad emails right after verification:
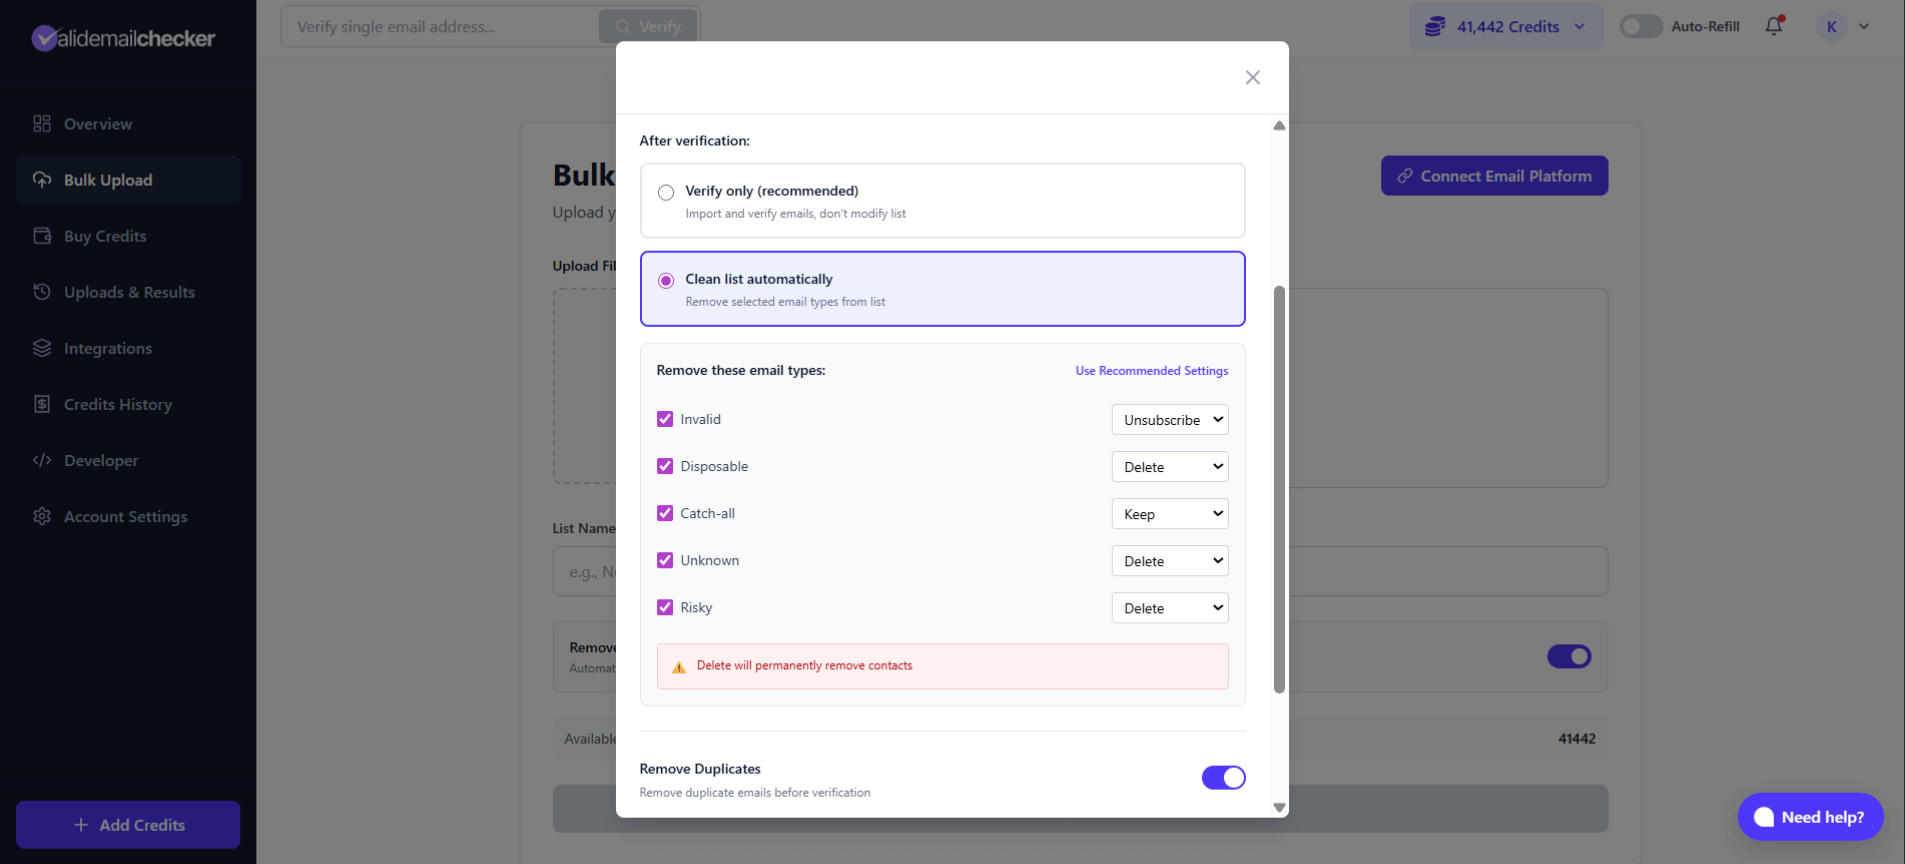
For each email type, choose an action:
| Email Type | Available Actions | Default |
|---|---|---|
| Invalid | Unsubscribe, Delete, Keep | Unsubscribe |
| Disposable | Unsubscribe, Delete, Keep | Delete |
| Catch-all | Unsubscribe, Delete, Keep | Keep |
| Unknown | Unsubscribe, Delete, Keep | Keep |
| Risky | Unsubscribe, Delete, Keep | Keep |
Unsubscribe keeps the contact in your audience but marks them as unsubscribed—they won't receive emails but you keep their data. Delete removes them completely from your Mailchimp audience.
When you choose Delete, contacts are permanently removed from your Mailchimp audience. This cannot be undone. If you're unsure, use Unsubscribe instead—you can always delete later.
Step 3: Configure Additional Options
- Remove Duplicates: Toggle on to skip duplicate emails (saves credits)
- Review the Credits needed vs Available credits
Step 4: Start Verification
Click Import List to begin verification.
You'll be redirected to the Uploads & Results page where you can monitor progress.
Monitoring Your Verification
Track your verification progress in real-time:
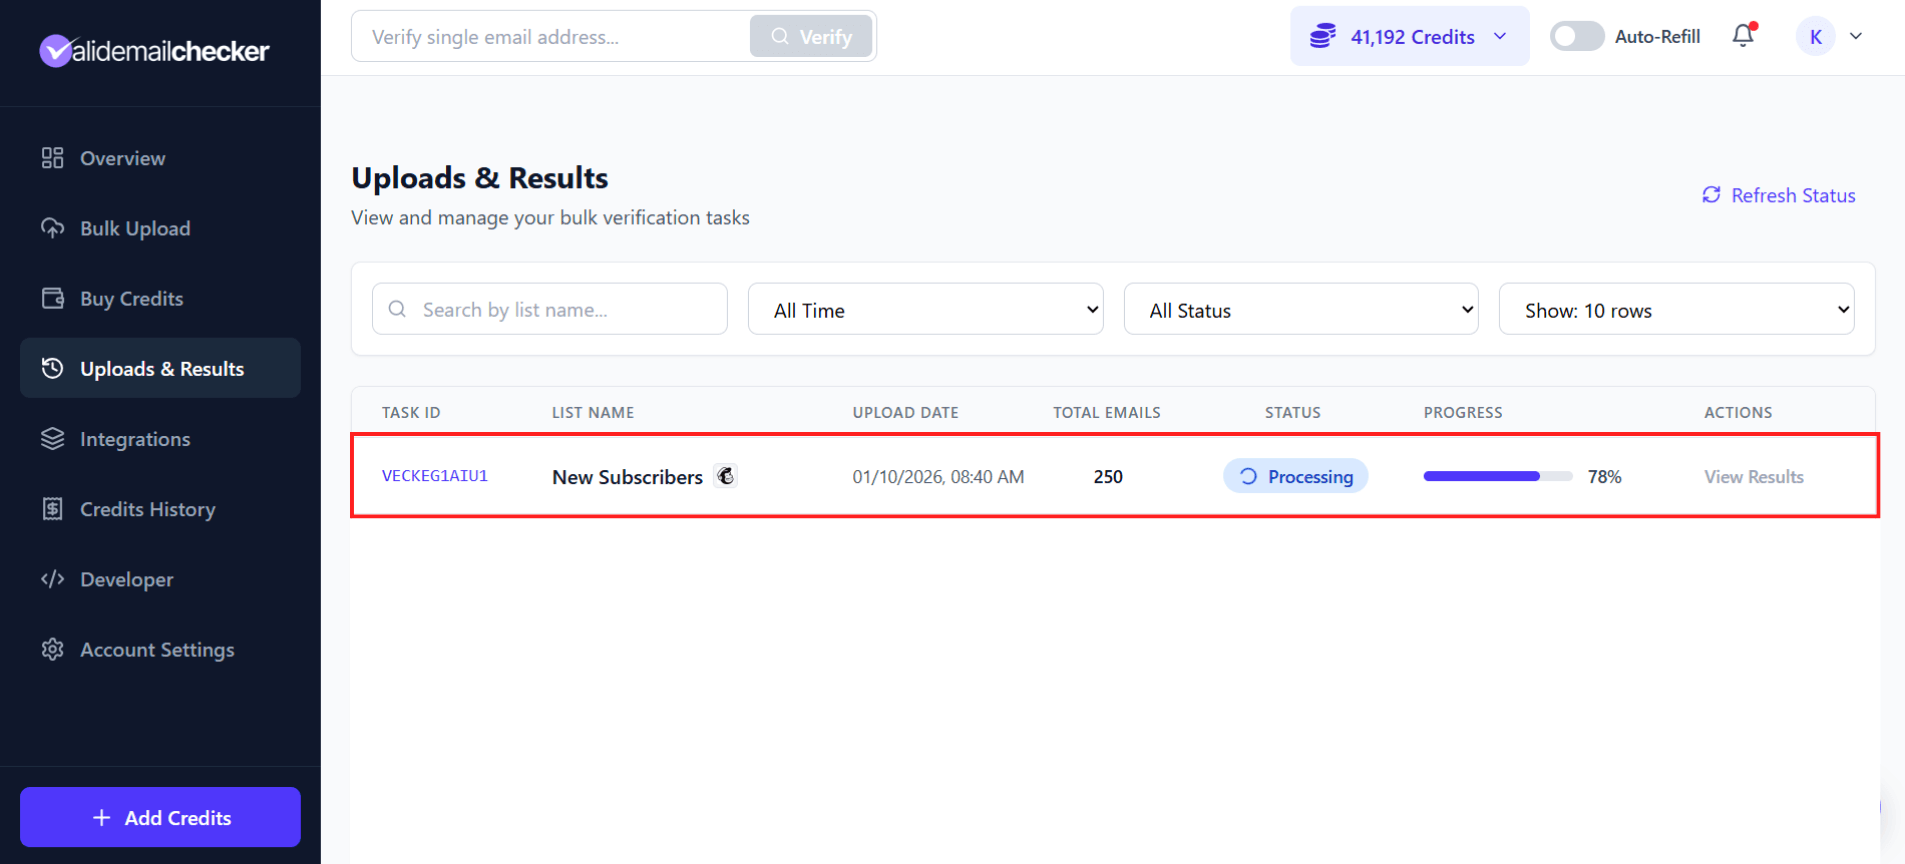
| Column | What It Shows |
|---|---|
| Task ID | Unique identifier (e.g., VECKEG1AIU1) |
| List Name | Your audience name with the Mailchimp icon |
| Upload Date | When verification started |
| Total Emails | Number of contacts being verified |
| Status | Processing, Completed, Failed, or Deleted |
| Progress | Percentage complete with progress bar |
| Actions | View Results when complete |
Verification Speed
| List Size | Estimated Time |
|---|---|
| 100 emails | A few seconds |
| 1,000 emails | 1-2 minutes |
| 10,000 emails | 5-10 minutes |
| 100,000 emails | 15-30 minutes |
| 1,000,000 emails | 1-2 hours |
The page updates automatically—no need to refresh.
Managing Your Mailchimp Connection
From the Integrations Page
Go to Integrations in the sidebar to see all your connections:
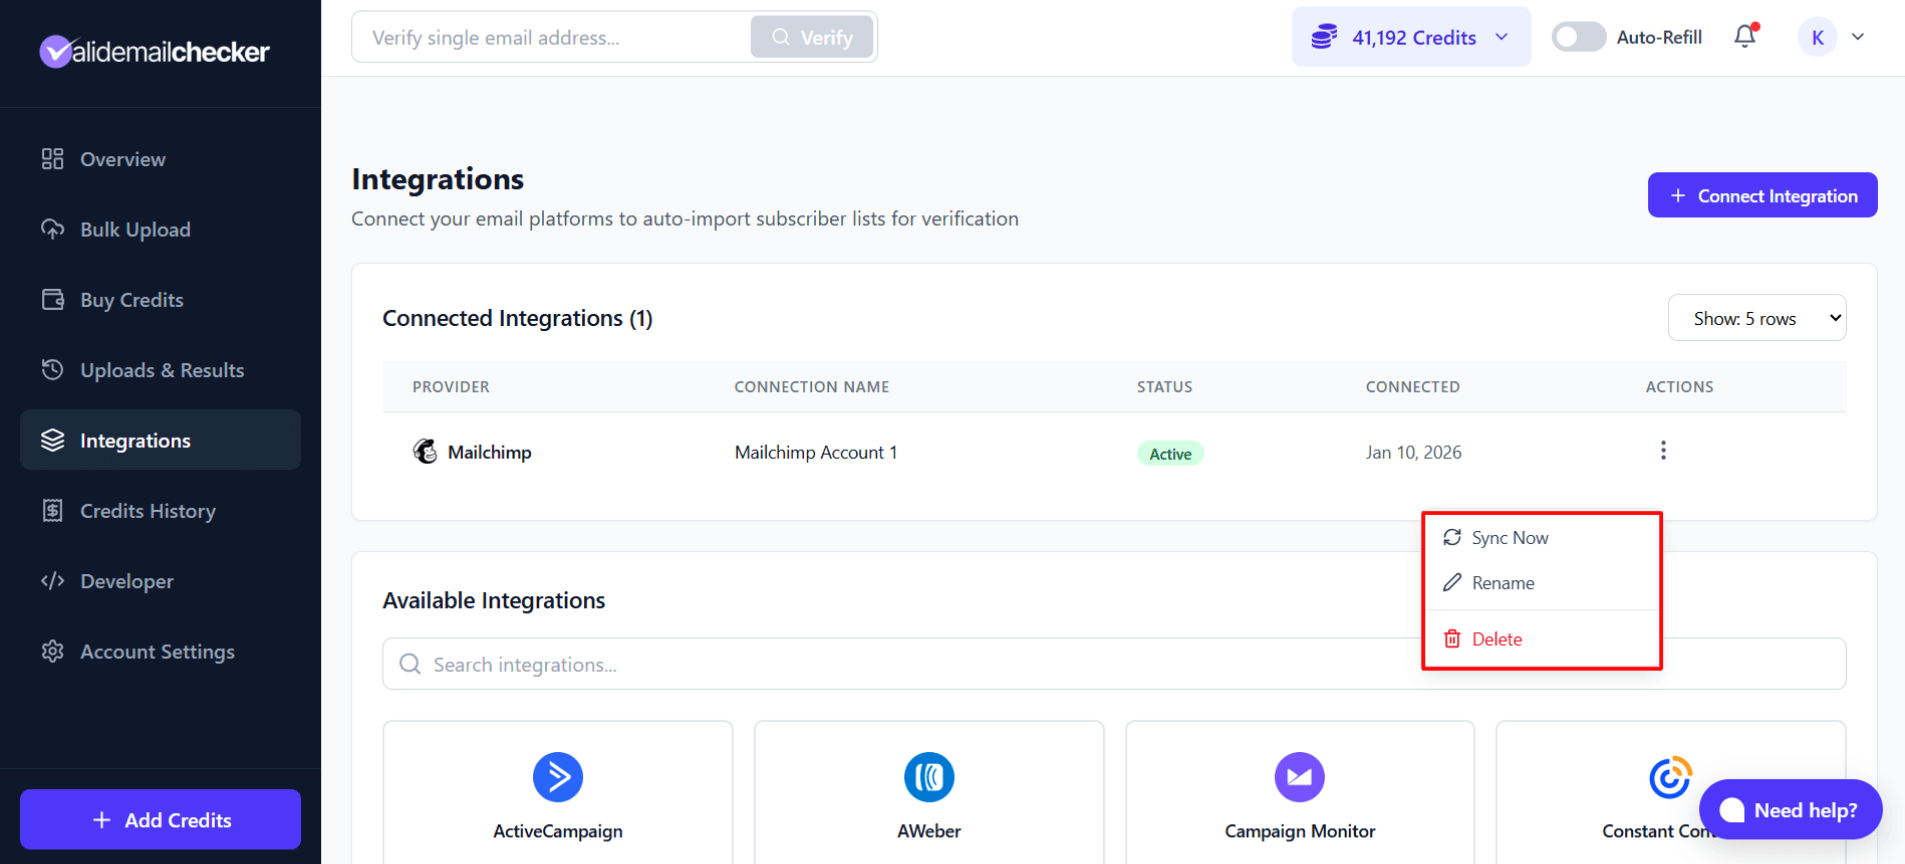
Click the three-dot menu (⋮) on any connection for options:
| Action | What It Does |
|---|---|
| Sync Now | Refresh your audience list from Mailchimp |
| Rename | Change the connection's display name |
| Delete | Remove the connection entirely |
When to Use Sync Now
Use Sync Now when:
- You've added new audiences in Mailchimp
- You've imported new contacts to existing audiences
- Lists aren't appearing that should be there
- You want to re-verify an audience with new contacts
Connecting Multiple Mailchimp Accounts
Managing multiple Mailchimp accounts? No problem.
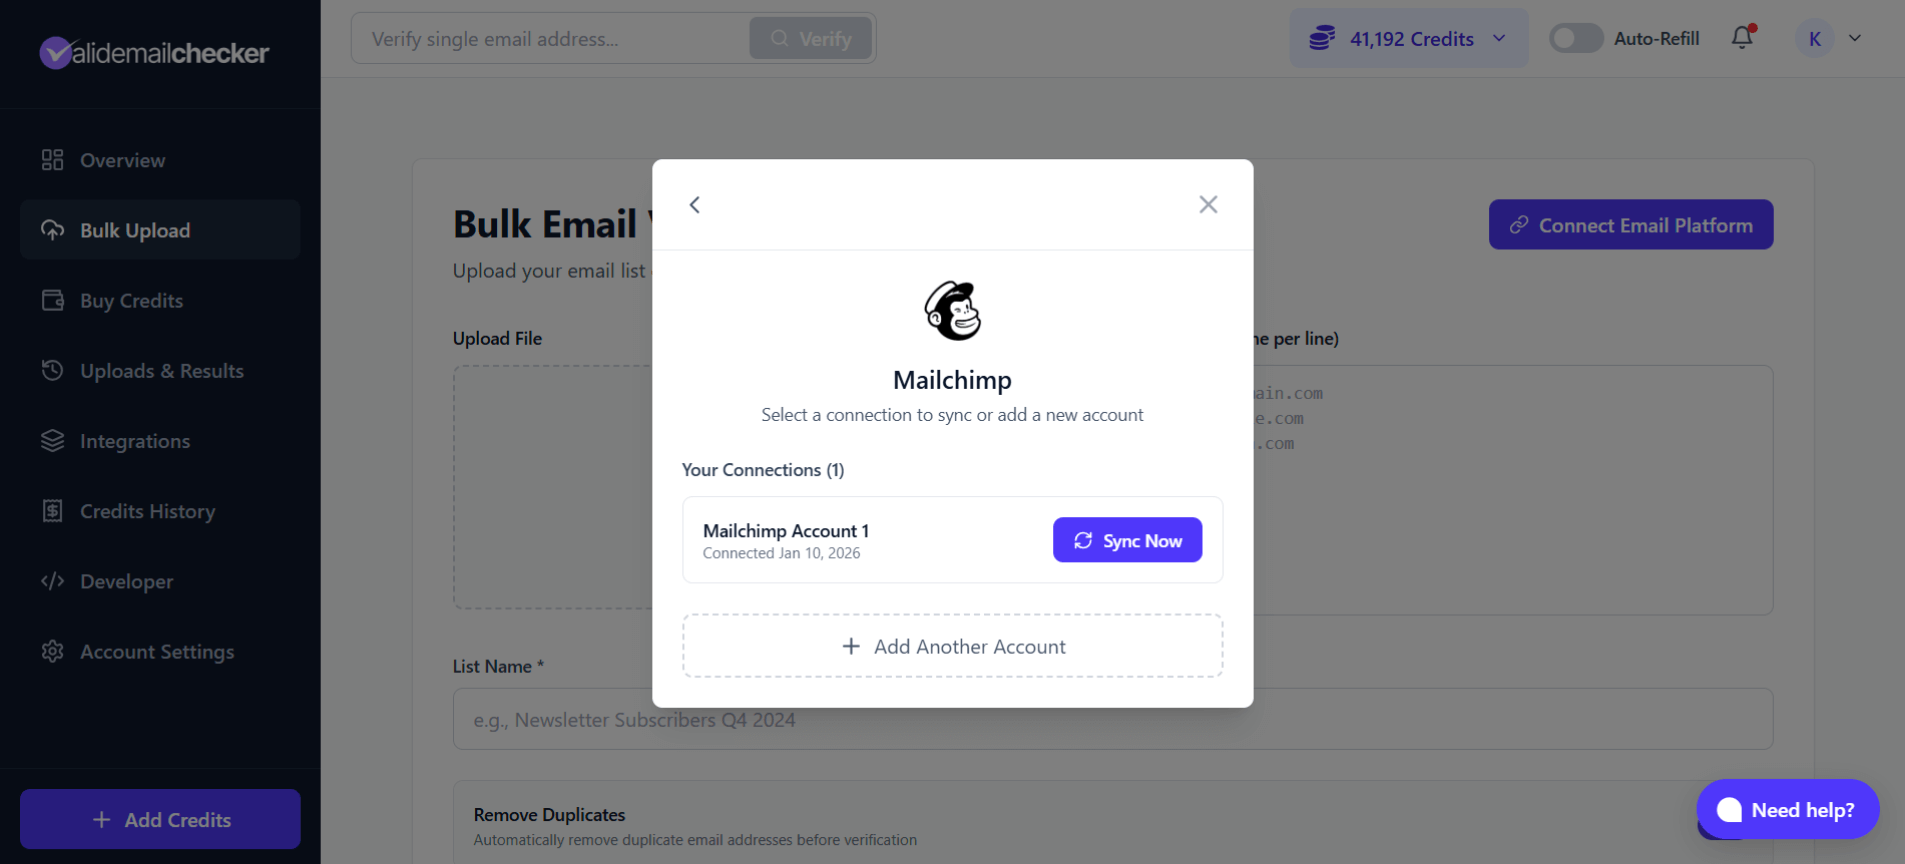
To Add Another Account:
- Click Connect Email Platform → Mailchimp
- You'll see your existing connections
- Click + Add Another Account
- Enter the API key for your additional Mailchimp account
- Give it a unique name to tell them apart
Tips for Multiple Accounts
- Use clear names like "Agency - Client A" or "Personal Newsletter"
- Each account needs its own API key from that Mailchimp account
- Verifications are tracked separately for each connection
Mailchimp-Specific Tips
Understanding Mailchimp Audiences
Mailchimp calls contact lists "audiences." A few things to know:
- Audience = List in other platforms
- Each audience can have multiple segments and tags
- Valid Email Checker imports the entire audience (all contacts in that audience)
- Segments and tags are preserved—we only verify and optionally clean
About Unsubscribed vs. Deleted
When you choose Unsubscribe for bad emails:
- Contact stays in your audience
- Marked as "Unsubscribed" in Mailchimp
- Won't receive campaigns or automations
- Still counts toward your audience limit
- You keep their profile data
When you choose Delete:
- Contact is permanently removed
- Doesn't count toward audience limit
- Profile data is gone forever
- Cannot be undone
Unsubscribe is safer. You can always bulk delete unsubscribed contacts later from within Mailchimp. But you can't un-delete someone.
API Key Best Practices
- Create a dedicated API key for Valid Email Checker
- Name it clearly so you remember what it's for
- If you suspect the key is compromised, delete it and create a new one
- You can have multiple active API keys
Troubleshooting
"Invalid API Key" Error
Cause: The API key is incorrect or incomplete.
Solution:
- Make sure you copied the full key including the data center suffix (e.g.,
-us21) - Check for extra spaces before or after the key
- Verify the key hasn't been deleted or disabled in Mailchimp
- Try generating a new API key
"No Audiences Found"
Cause: Your Mailchimp account doesn't have any audiences, or there's a permission issue.
Solution:
- Log in to Mailchimp and confirm you have at least one audience
- Check that the API key has full account access
- Click Sync Now to refresh the audience list
Audience Not Showing Up
Cause: The audience list may be cached.
Solution:
- Go to Integrations in Valid Email Checker
- Find your Mailchimp connection
- Click the three-dot menu → Sync Now
- Wait a moment, then try selecting lists again
Verification Stuck at 0%
Cause: Usually a temporary connection issue.
Solution:
- Wait a few minutes—it may start processing
- Check if Mailchimp is experiencing any outages
- Try disconnecting and reconnecting the integration
- Contact support if the issue persists
Changes Not Appearing in Mailchimp
Cause: If you used "Clean list automatically," changes may take a moment to sync.
Solution:
- Wait 5-10 minutes for Mailchimp to process changes
- Refresh your Mailchimp audience page
- Check the verification results to confirm actions were taken
Frequently Asked Questions
Does this affect my Mailchimp billing?
No. Valid Email Checker uses Mailchimp's API to read and optionally modify contacts, but it doesn't affect your Mailchimp subscription or billing.
Can I verify segments instead of the whole audience?
Currently, Valid Email Checker imports the entire audience. To verify just a segment, you'd need to export that segment from Mailchimp and upload it via file upload instead.
Will verified contacts be tagged in Mailchimp?
No. Valid Email Checker verifies the emails but doesn't add tags or modify contact fields. Actions only include unsubscribe or delete for the "Clean list automatically" option.
What happens to archived contacts?
Archived contacts in Mailchimp are not included in the verification. Only subscribed and unsubscribed (but not archived or deleted) contacts are imported.
Can I reconnect if I accidentally delete the integration?
Yes! Just add a new connection with your API key. Your verification history in Valid Email Checker is preserved—only the connection is removed.
Is my Mailchimp data secure?
Absolutely. We only access what's needed for verification (email addresses and contact status). We don't store your Mailchimp data after verification, and your API key is encrypted. See our Data & Privacy Policy for details.
Next Steps
Your Mailchimp integration is ready! Here's what to do next:
- Understanding Verification Results — Learn what each status means
- Credit System — Understand how credits work
- Bulk Verification Guide — Deep dive into verification options
Need Help?
Running into issues? We're here to help:
- Live Chat: Click the chat bubble in your dashboard
- Email: support@validemailchecker.com
- Help Center: Browse more guides at help.validemailchecker.com